

Home, search, and the anny AI Agent
After you log in, the Home page opens. It shows three Dashboard Widgets of your choice for today and tomorrow, Getting Started, New Features, notifications, and My To-dos.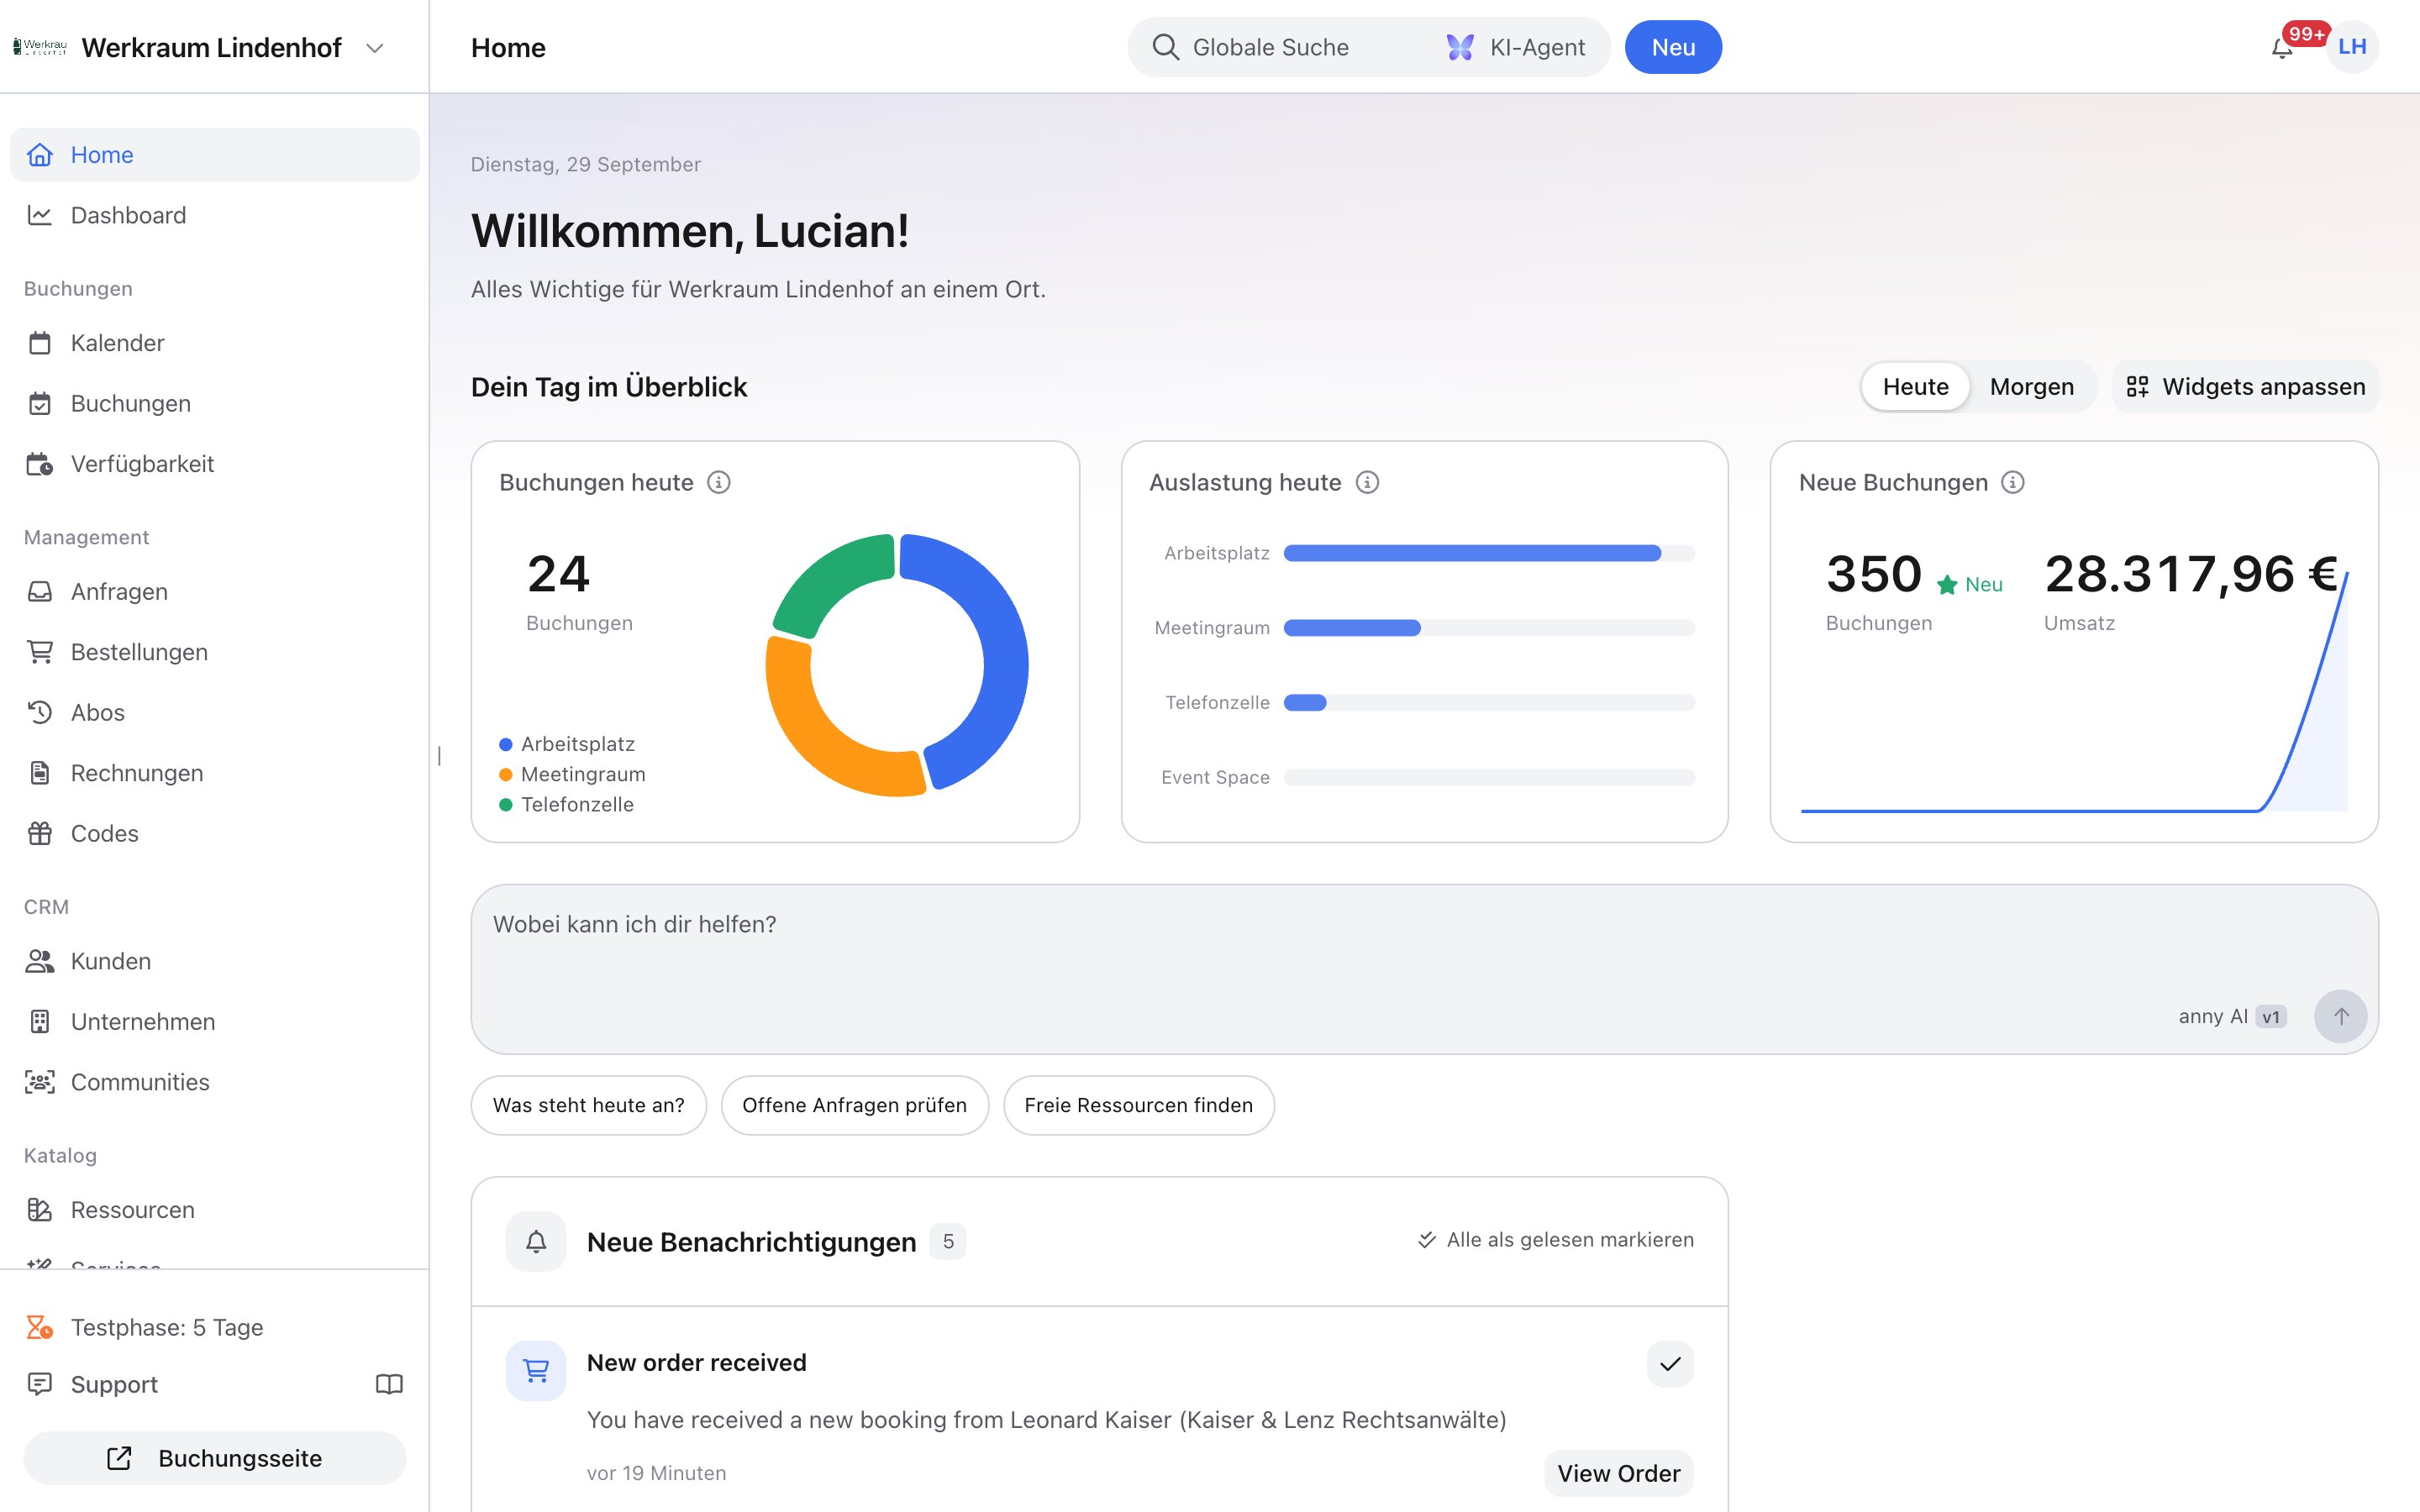
⌘K searches everywhere and previews a result before you open it.
“The Salon is closed tomorrow”: the agent checks the bookings and changes them only after your approval.
Navigation
The sidebar stays on the left. You know the destinations; grouping and order are new. Move items you rarely use to Hidden with Hide from sidebar. Bring them back with Show in sidebar.Calendar
The calendar gets more space. Resource selection sits in Filter, a side panel next to the calendar, no longer in a rail on the left. The filter stays open. Saved views apply to the calendar and the resource list and can be renamed, shared, duplicated, and reordered.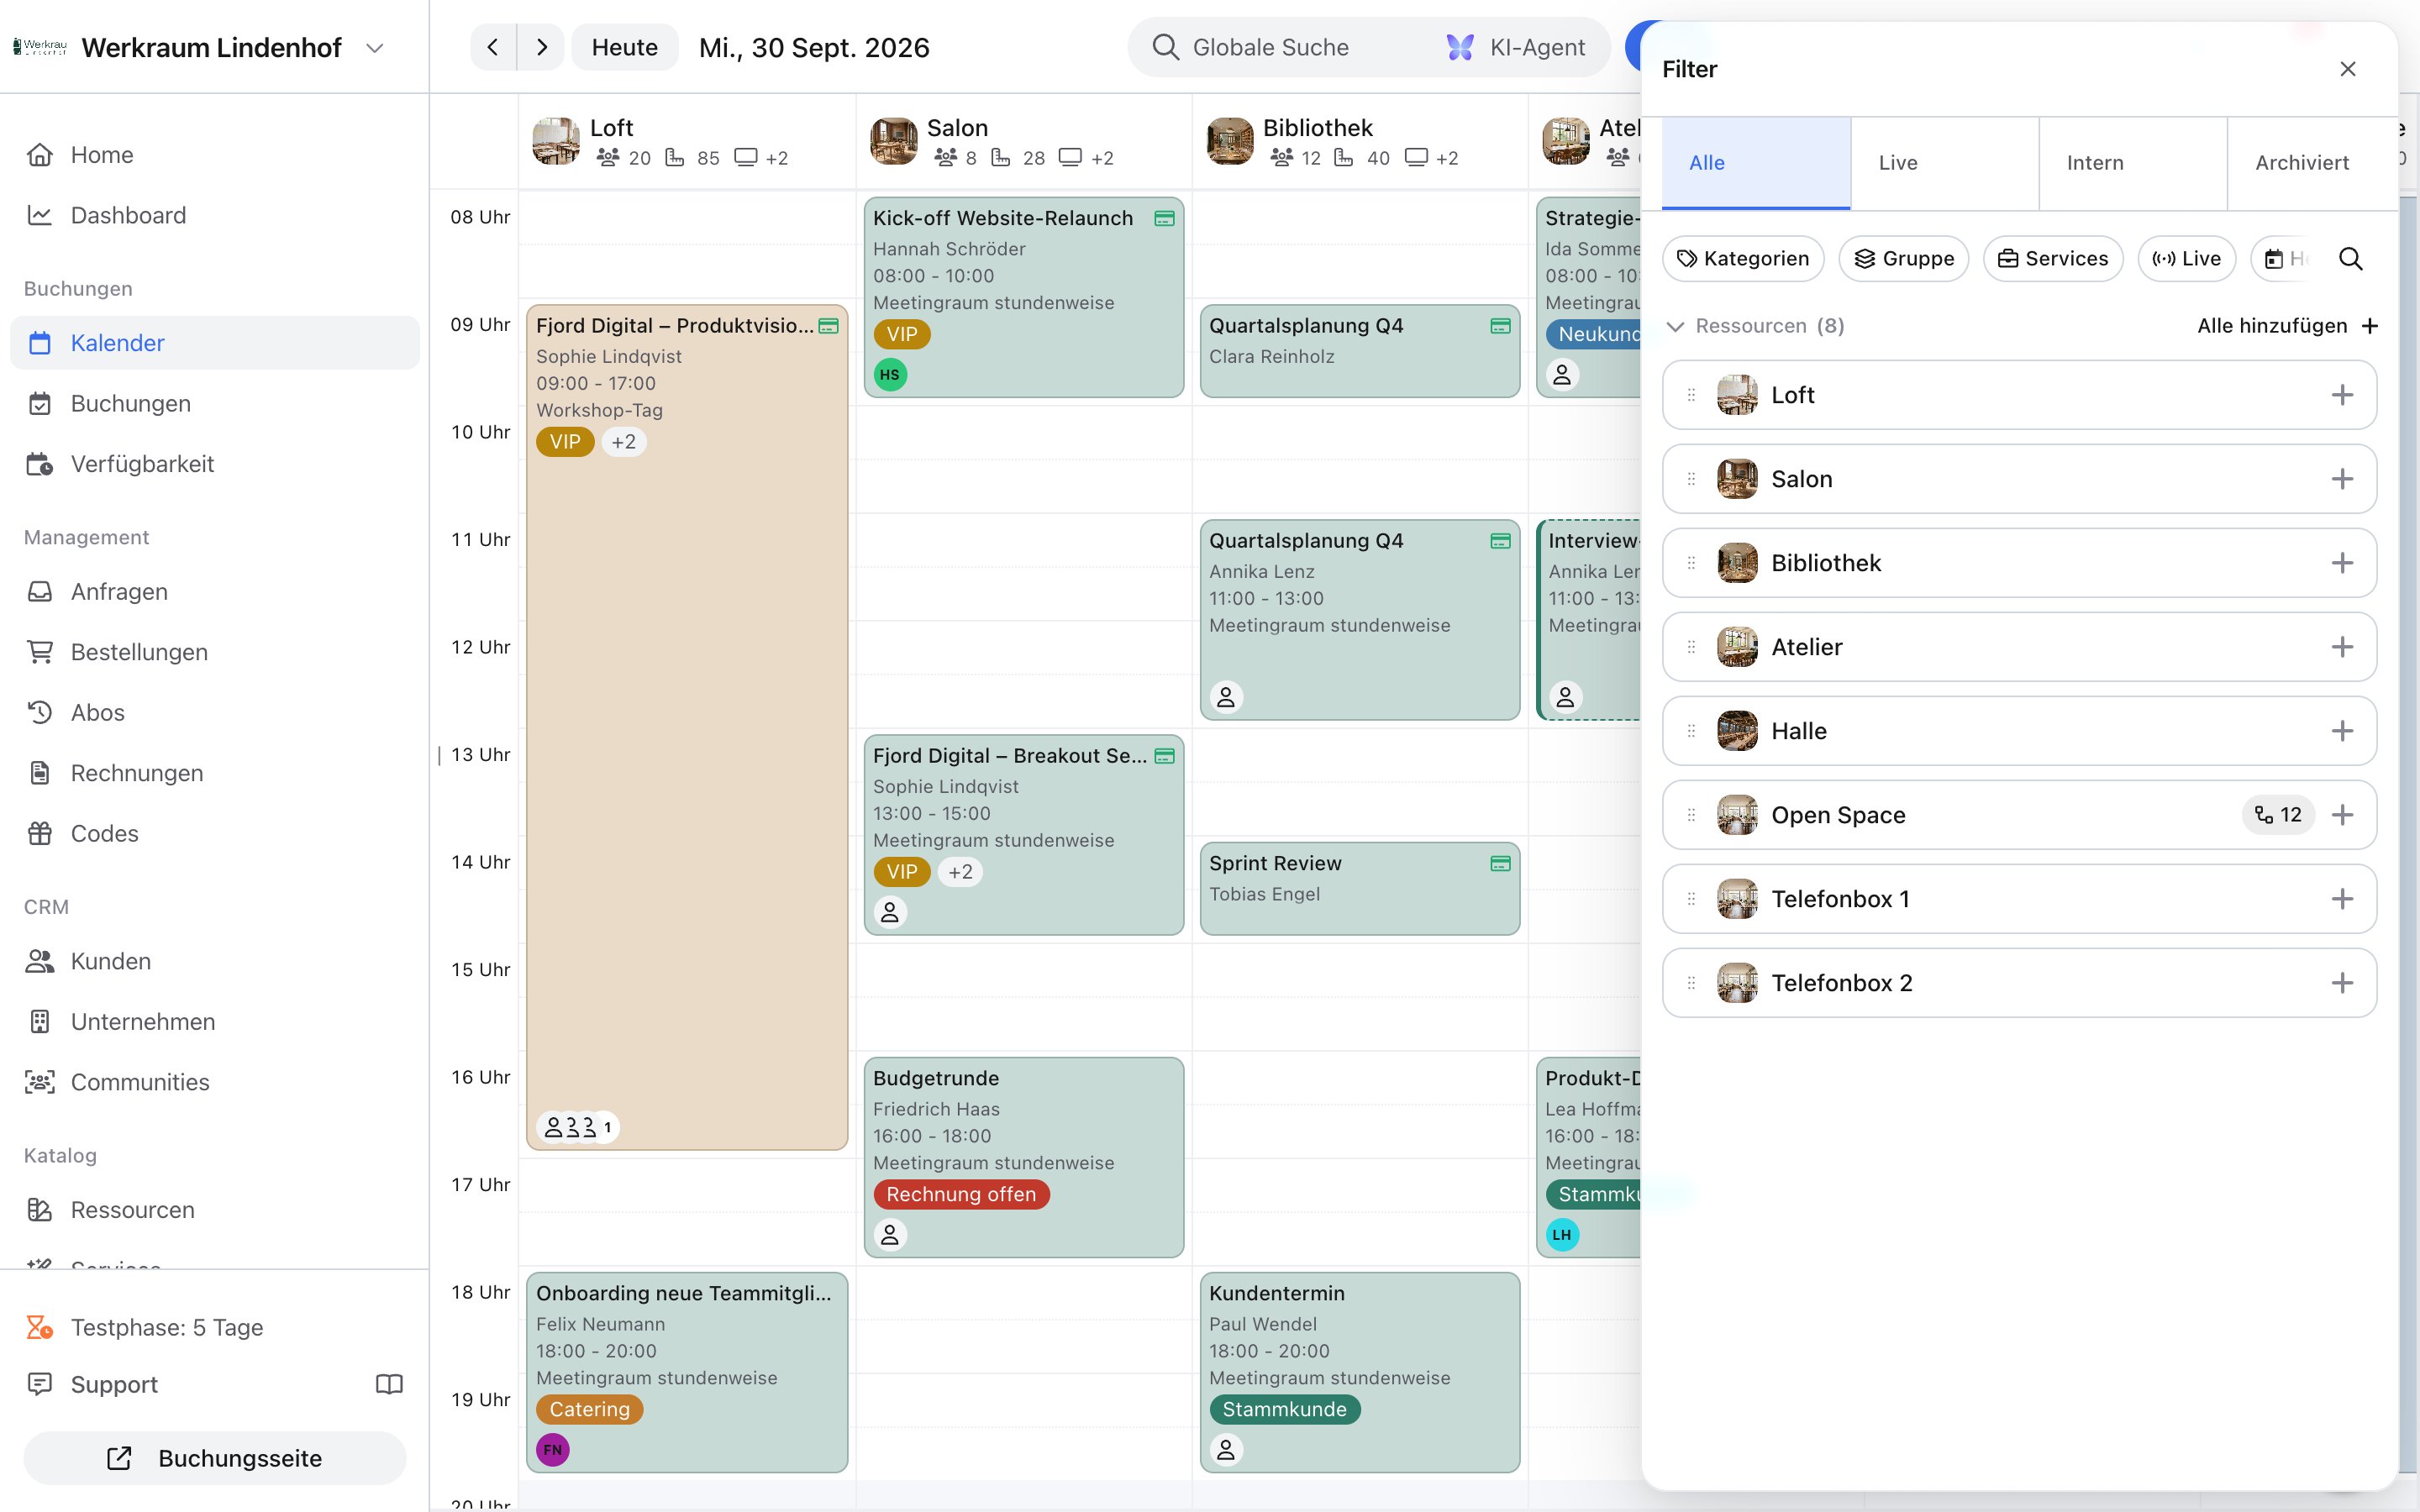
Select a time range, pick a service, add products, choose the customer and complete the order.
Orders, inquiries, and quotes
The order can be the central process. You attach bookings, products, booking bundles, and discounts to it instead of working appointment by appointment. In the calendar you combine several bookings into one process. You merge two orders that are not drafts and have neither a payment nor an issued invoice. On the order, choose Merge into another order, pick the target order, and confirm with Merge. Bookings, products, and passes move there, and the source order is deleted. The target order keeps its customer. Bookings of the previous customer move to that customer.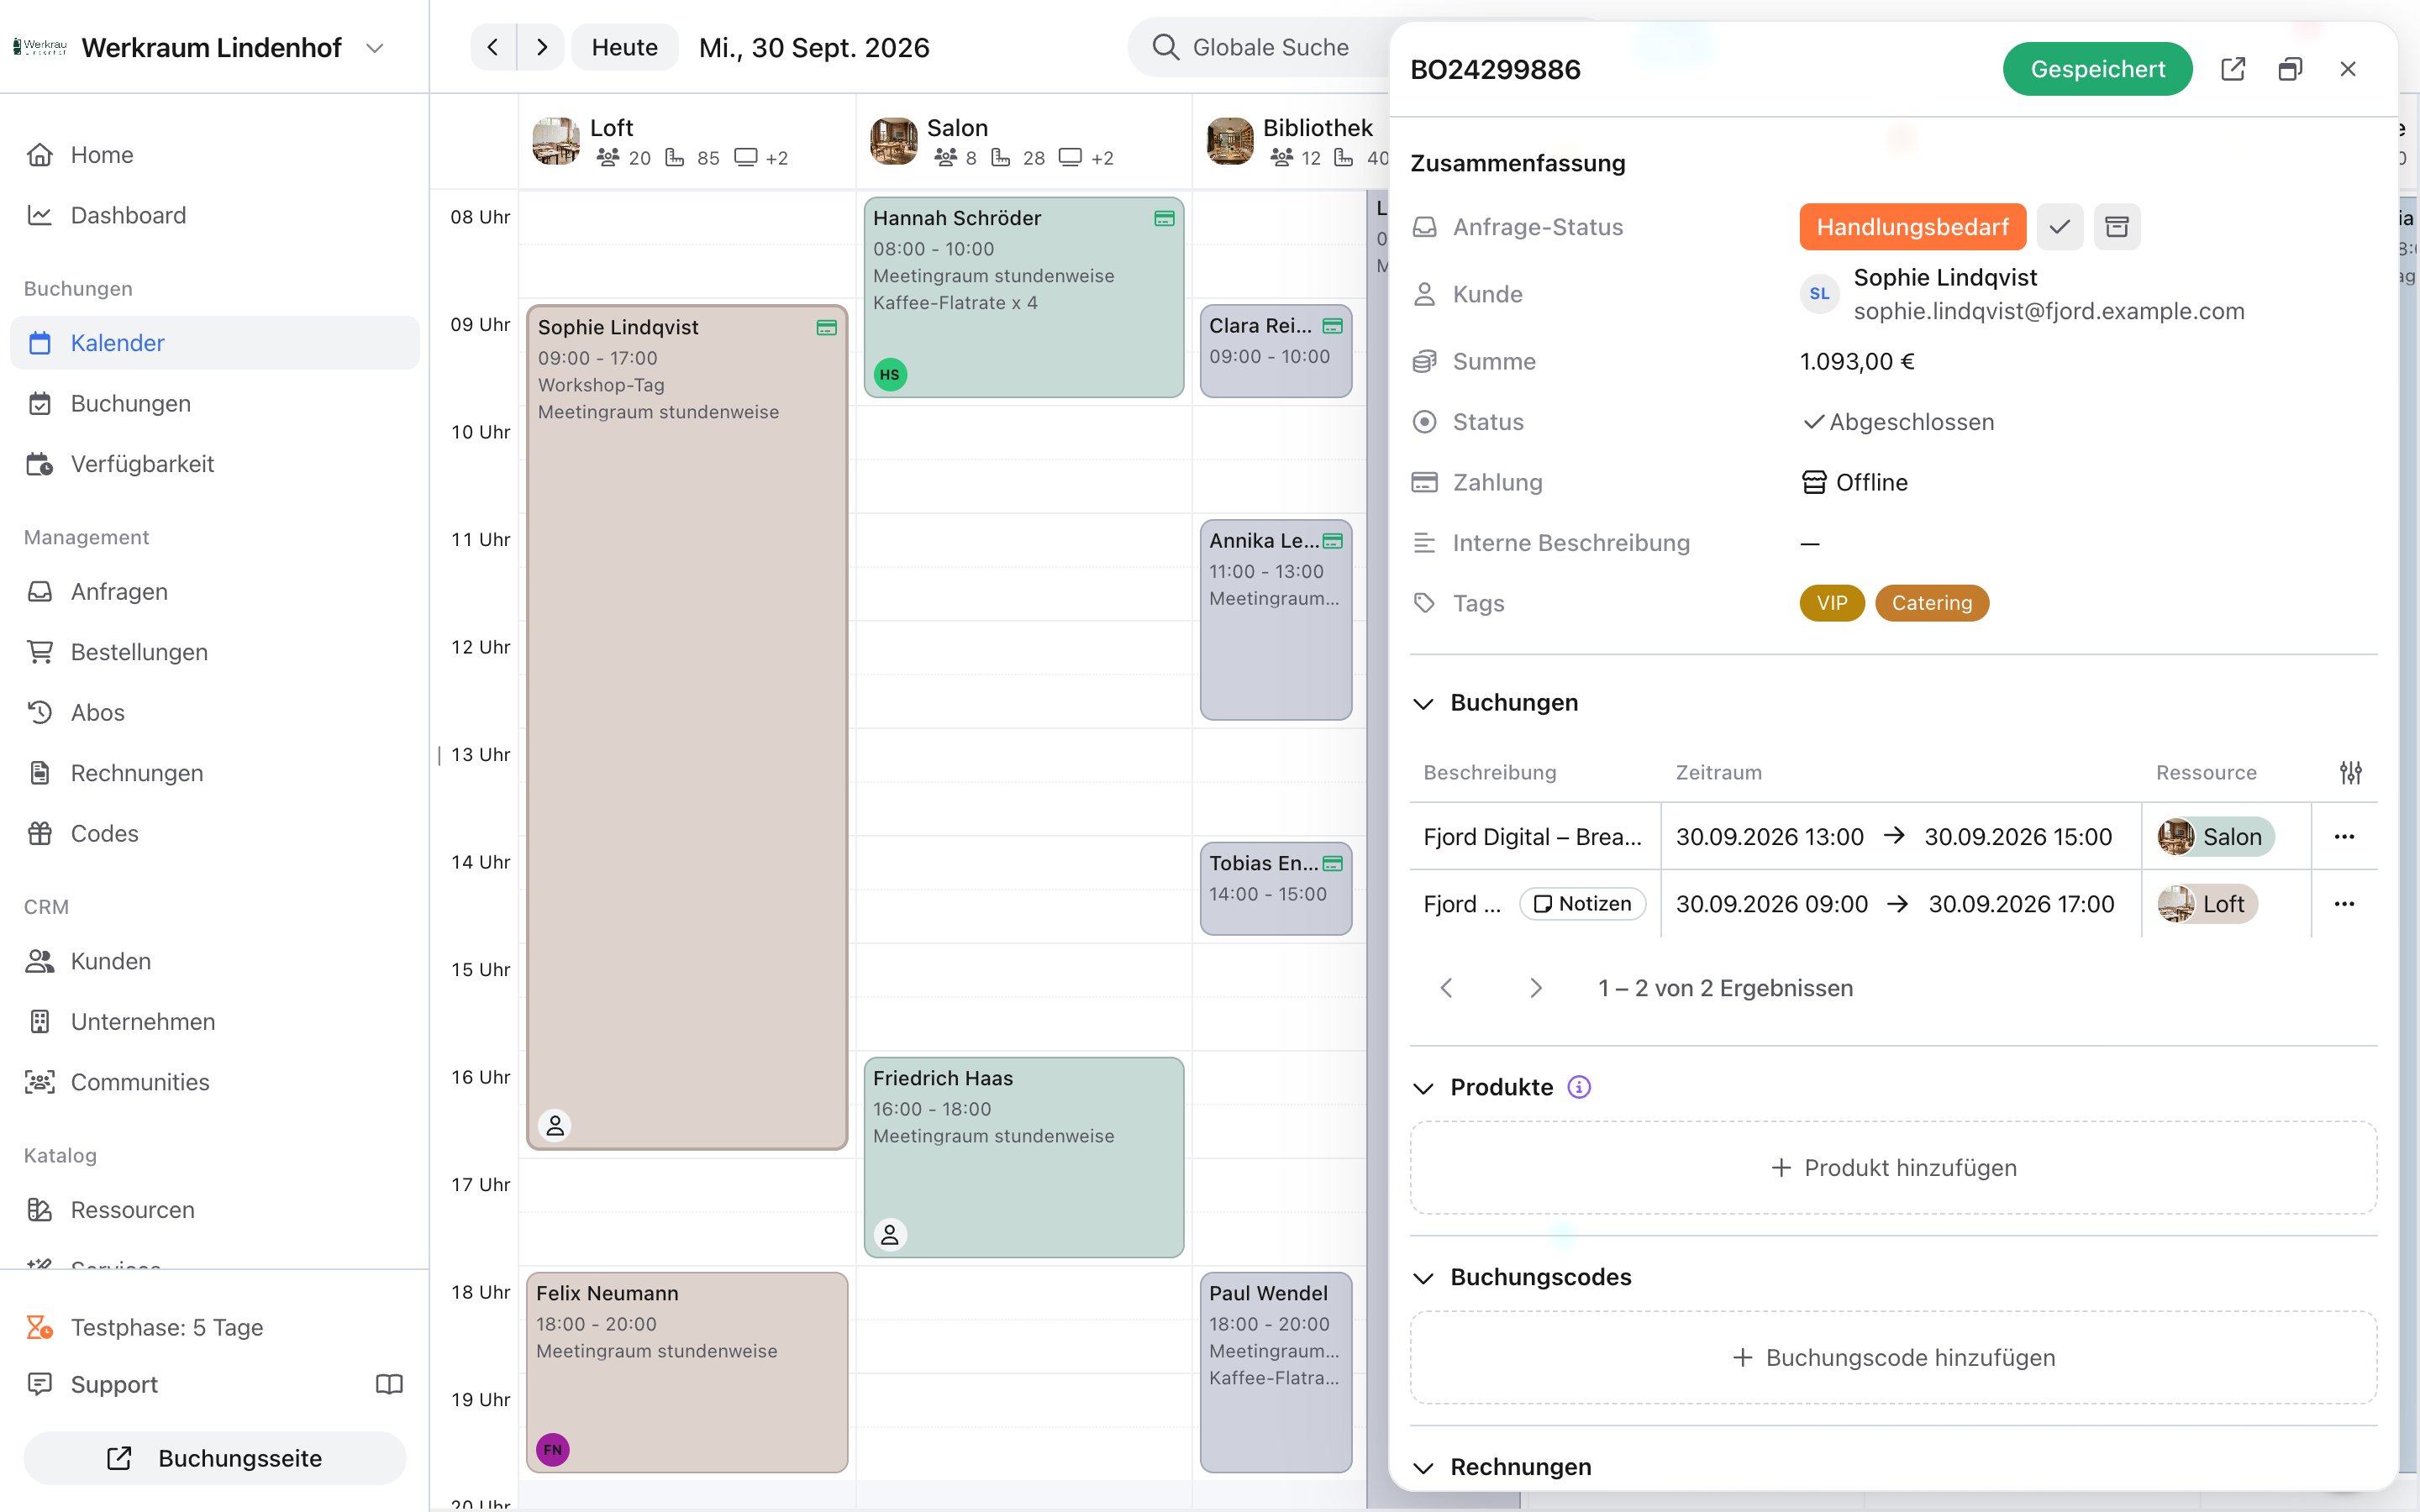
Send a quote with a validity date and reserved appointments.
Booking management
You still work on bookings in the calendar, in the Bookings list, and on the booking detail page. The idea matches orders: you work on the process, not on scattered forms.Select 30 bookings and change them together.
Communication
Internal and external communication now runs through the Activity, in chronological order. You find it on the right of the detail page of a Booking, an Order, or a Customer, and in the calendar preview. Learn more. The feed shows automatically recorded events (status, changes, access, sync) and what your team writes or sends. At the top you filter by Everything, Notes, Communication, Changes, and System. Next to it you can search the activity.The customer reply lands in the activity. You answer from there.
Communication
Communication
Notes and to-dos
Notes and to-dos
Tags
Tags are organization-wide labels (name, optional color). You use them on bookings, orders, customers, resources, and services. The same tag (for example VIP) applies everywhere. Anyone who may edit a record can tag it; you create and rename tags from the tag picker or via Manage tags. Changes save immediately. Learn more.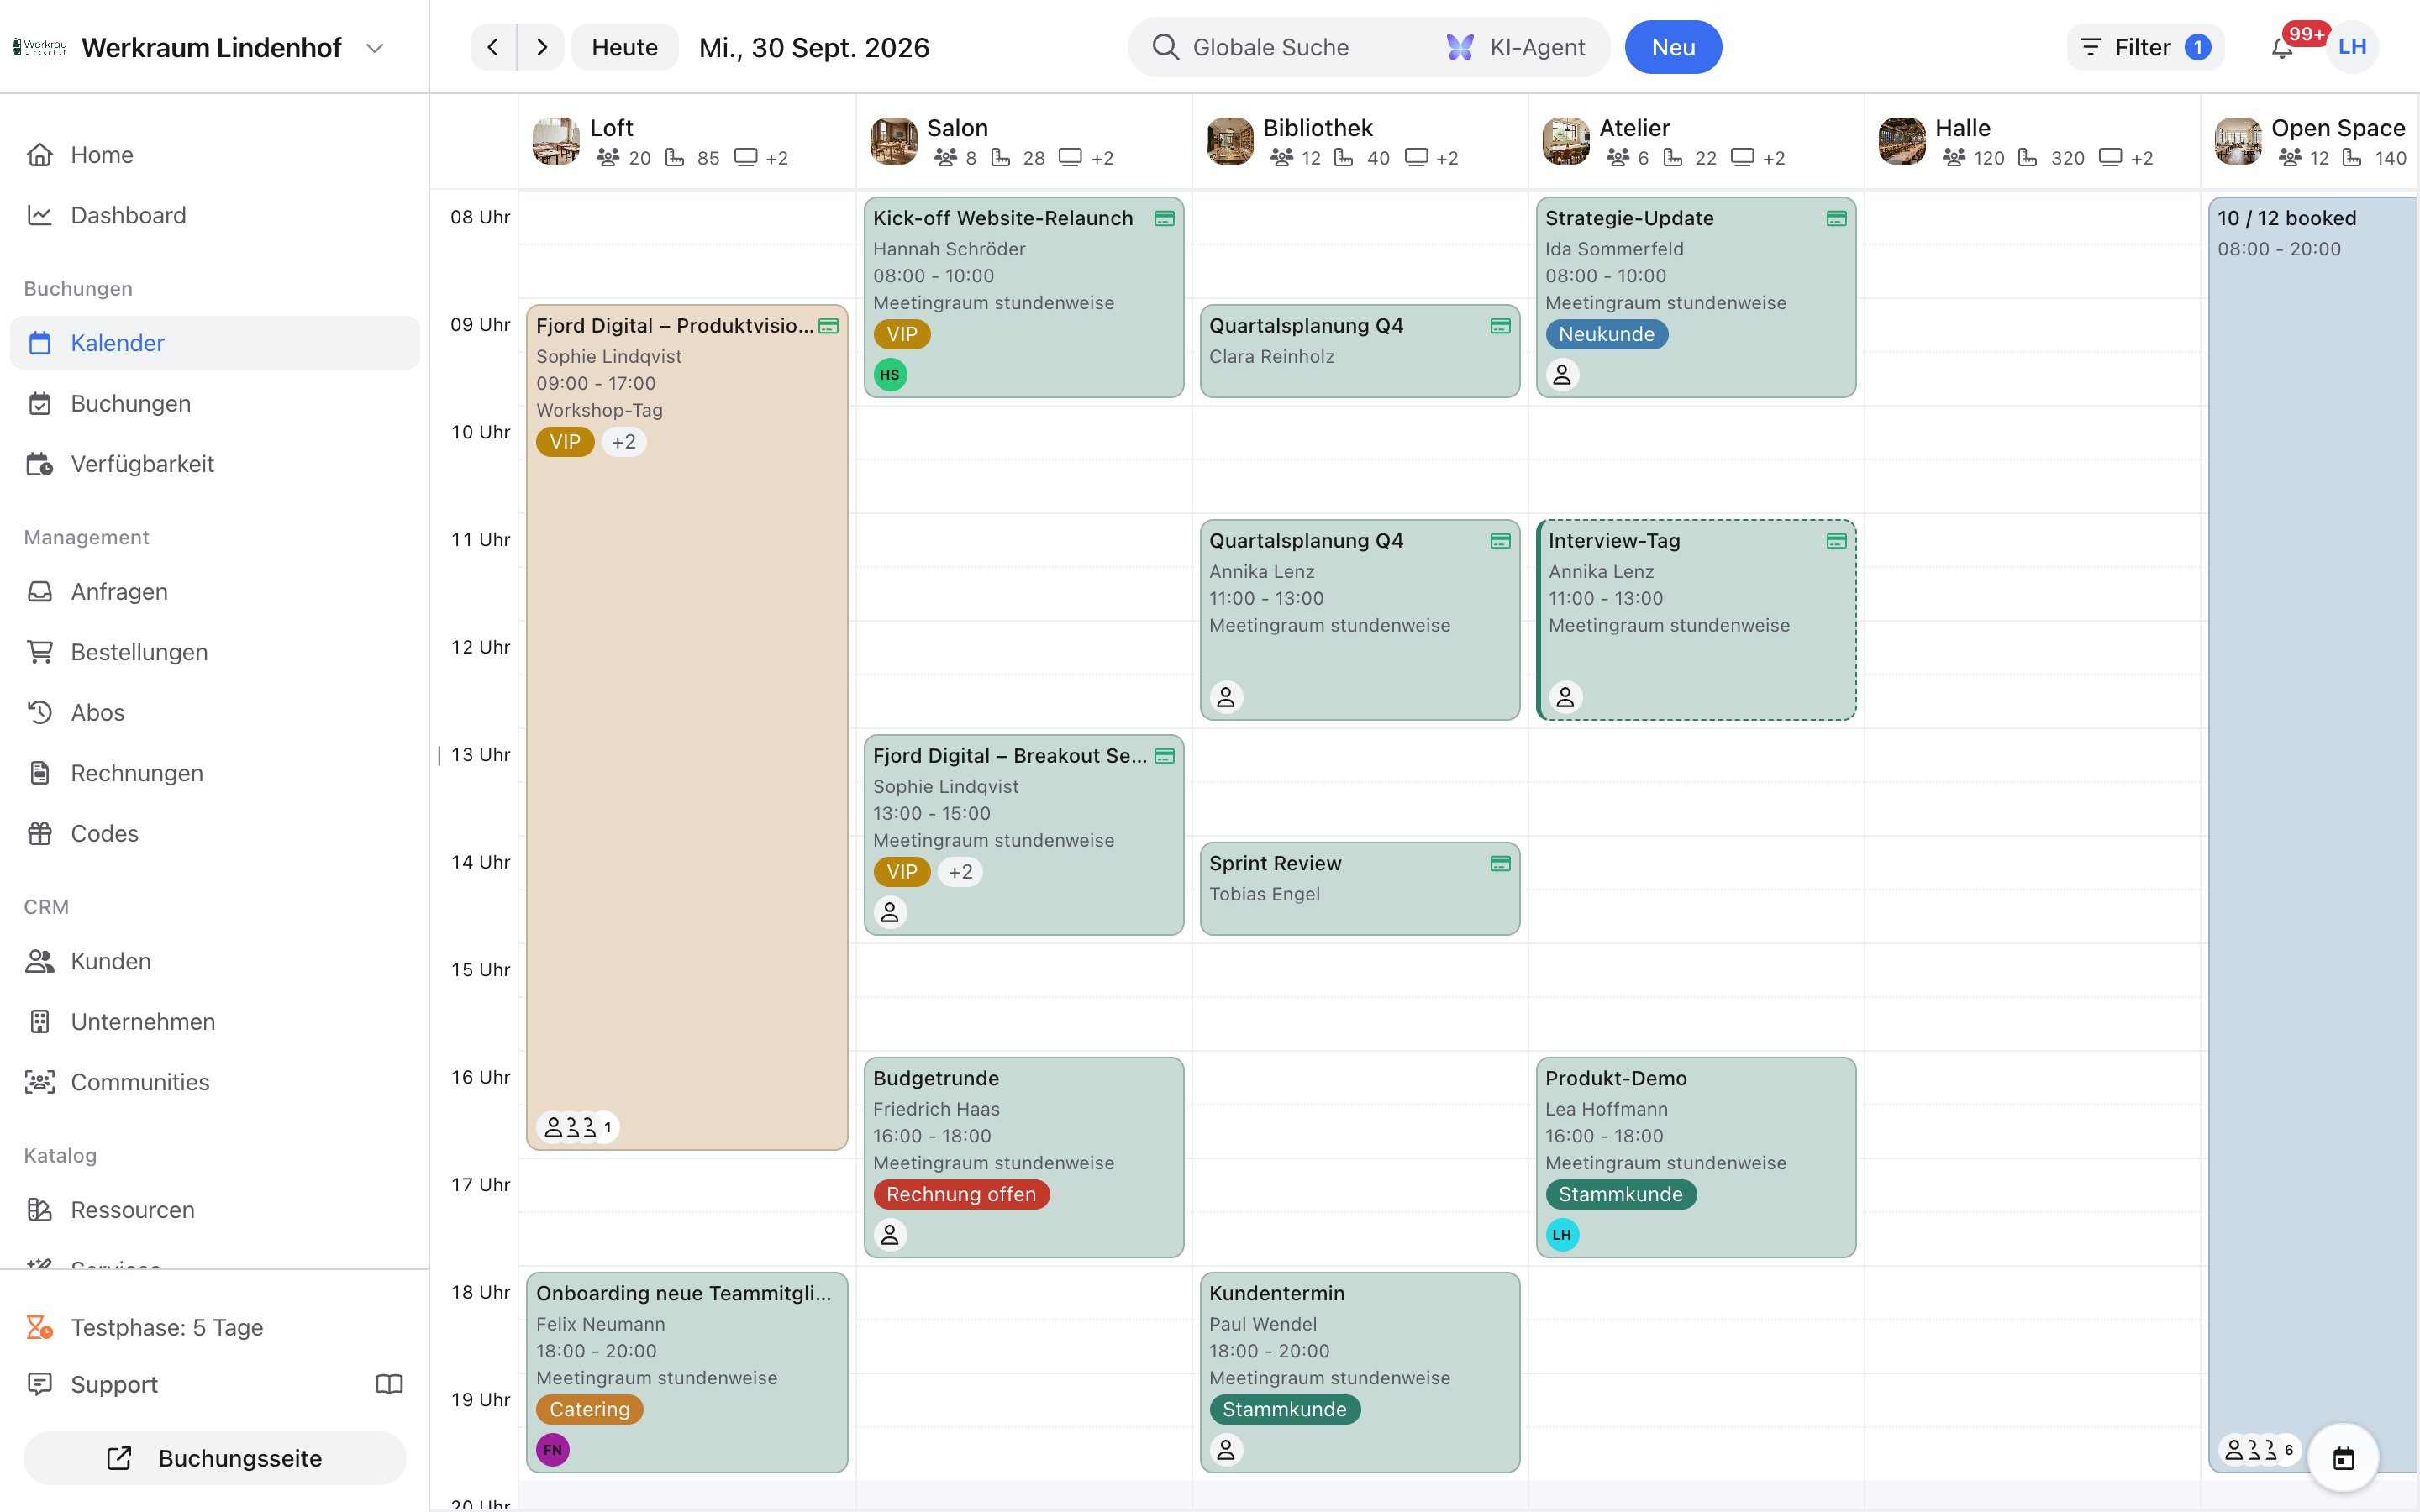
Booking management
Booking management
- On the record: set or remove chips under Tags in the booking details; inline in the table as well.
- Filter: filter the bookings list by Tags (at least one of the selected tags).
- Bulk edit: selection → Edit tags → Add or Remove.
- In the calendar, the card shows the tags of the booking, the order, and the customer together.
Resources
Resources
- On the resource under Tags (note: Tags are saved immediately.).
- Filter the resource list and label several rooms or objects at once with Edit tags.
Customers
Customers
- In the customer details under Tags.
- Filter the customer list by Tags.
- No Edit tags bulk action in the customer list (as of Admin 3.0). Customer tags also appear on the booking’s calendar card.
Lists and tables
Almost all large lists use the same table system. You save a View deliberately, private or for the team. Filters no longer save automatically. Many values you change directly in the row. You often create new entries in the last row. Selected rows open bulk actions, for example tagging, cancelling, messaging, moving, or exporting. You set up columns via the settings icon in the table header.Views
A View is a named setup. In tables it remembers filters, visible columns, their order, and the sort. In the calendar, the same resource view controls which resources you see. Calendar and resource list share these views but remember separately which one is active. The tabs sit above the list. Shared views are on the left, private ones on the right (lock icon).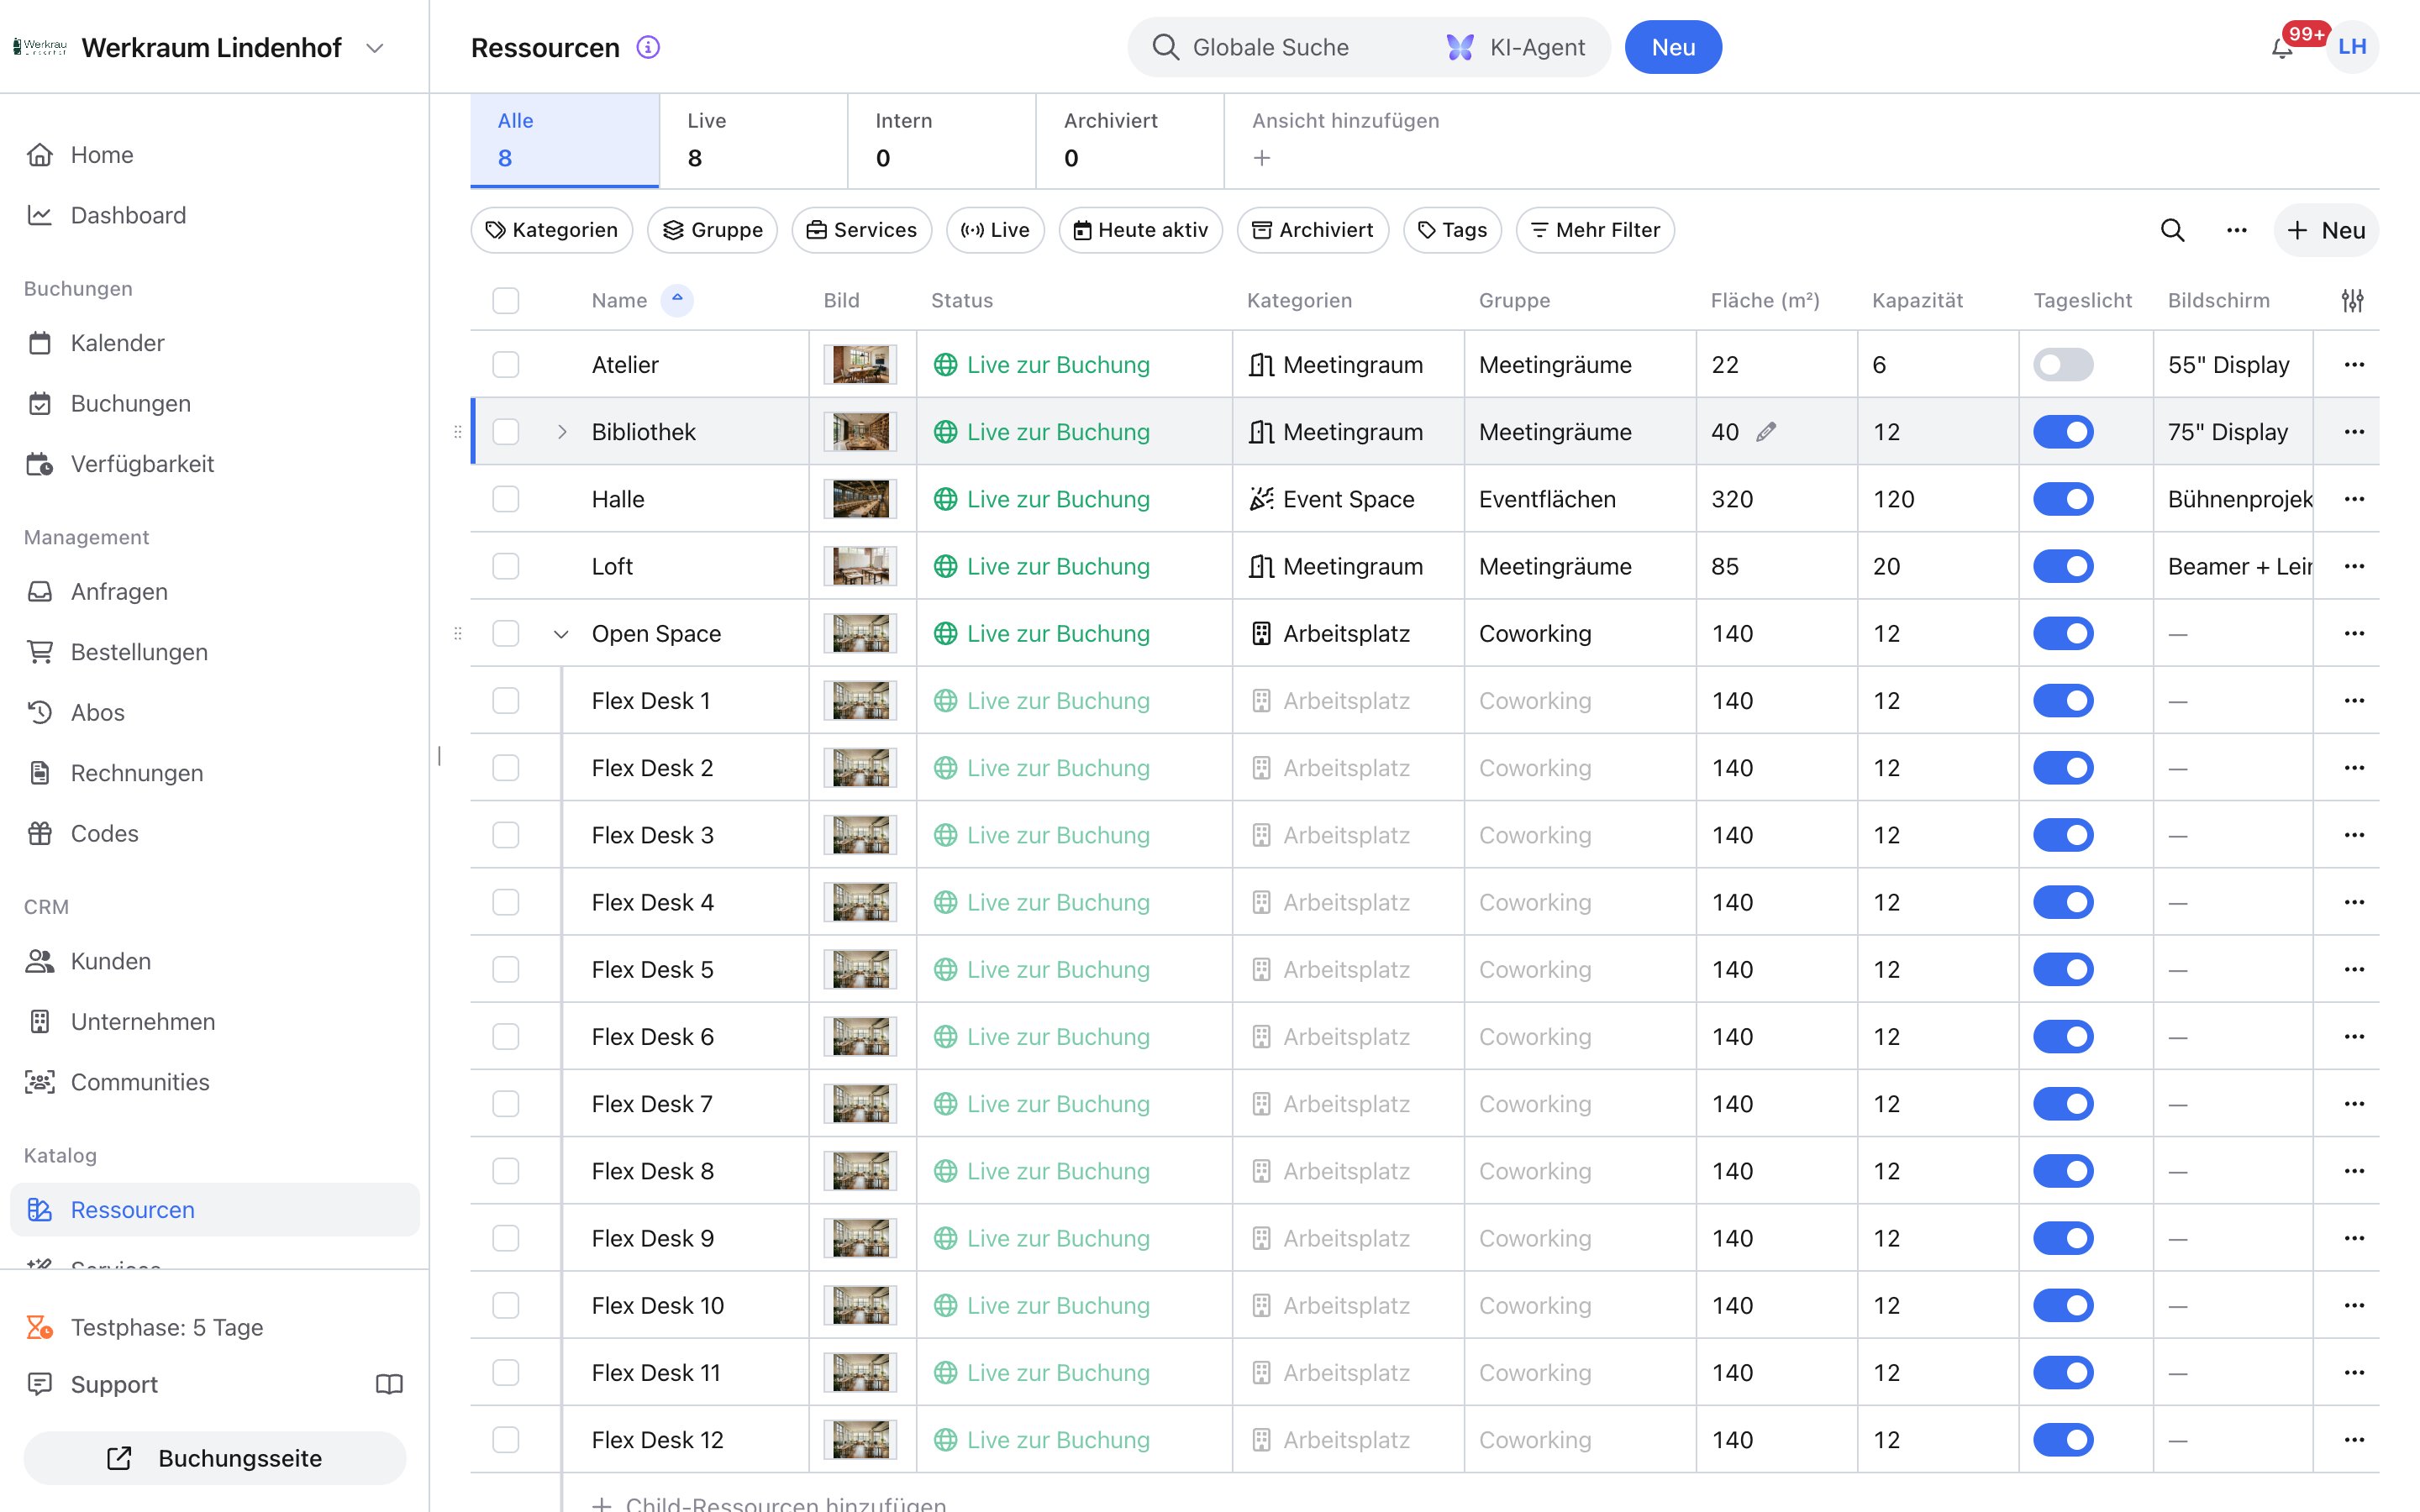
How to create a view
How to create a view
- Set filters, columns, and sort the way you need them.
- Click Add view.
- Enter a View name.
- Optionally turn on Shared view (Visible to all team members).
- Click Save view. If you change filters or columns on an existing view, anny does not save that on its own until you turn on Auto-save in the tab menu. In the unsaved-changes menu the same option is Enable auto-save. The view then saves on its own. If a save fails, Auto-save stays off for that view until you turn it on again. While it is off, you choose Save (overwrite this view), Save as new view, or Discard changes. In the tab menu (⋯ on hover, right-click, or Shift+F10): Edit view, Duplicate, Auto-save, Remove. The last view of a list cannot be deleted. Drag and drop to reorder, within the private or shared group. Typical use: Today’s inquiries, Unpaid invoices, Meeting rooms in the calendar and in the resource list.
Catalog and detail pages
Detail pages follow the same layout: page header, action menu, Save at the top with a visible status, activity on the record. Settings sit in collapsible groups.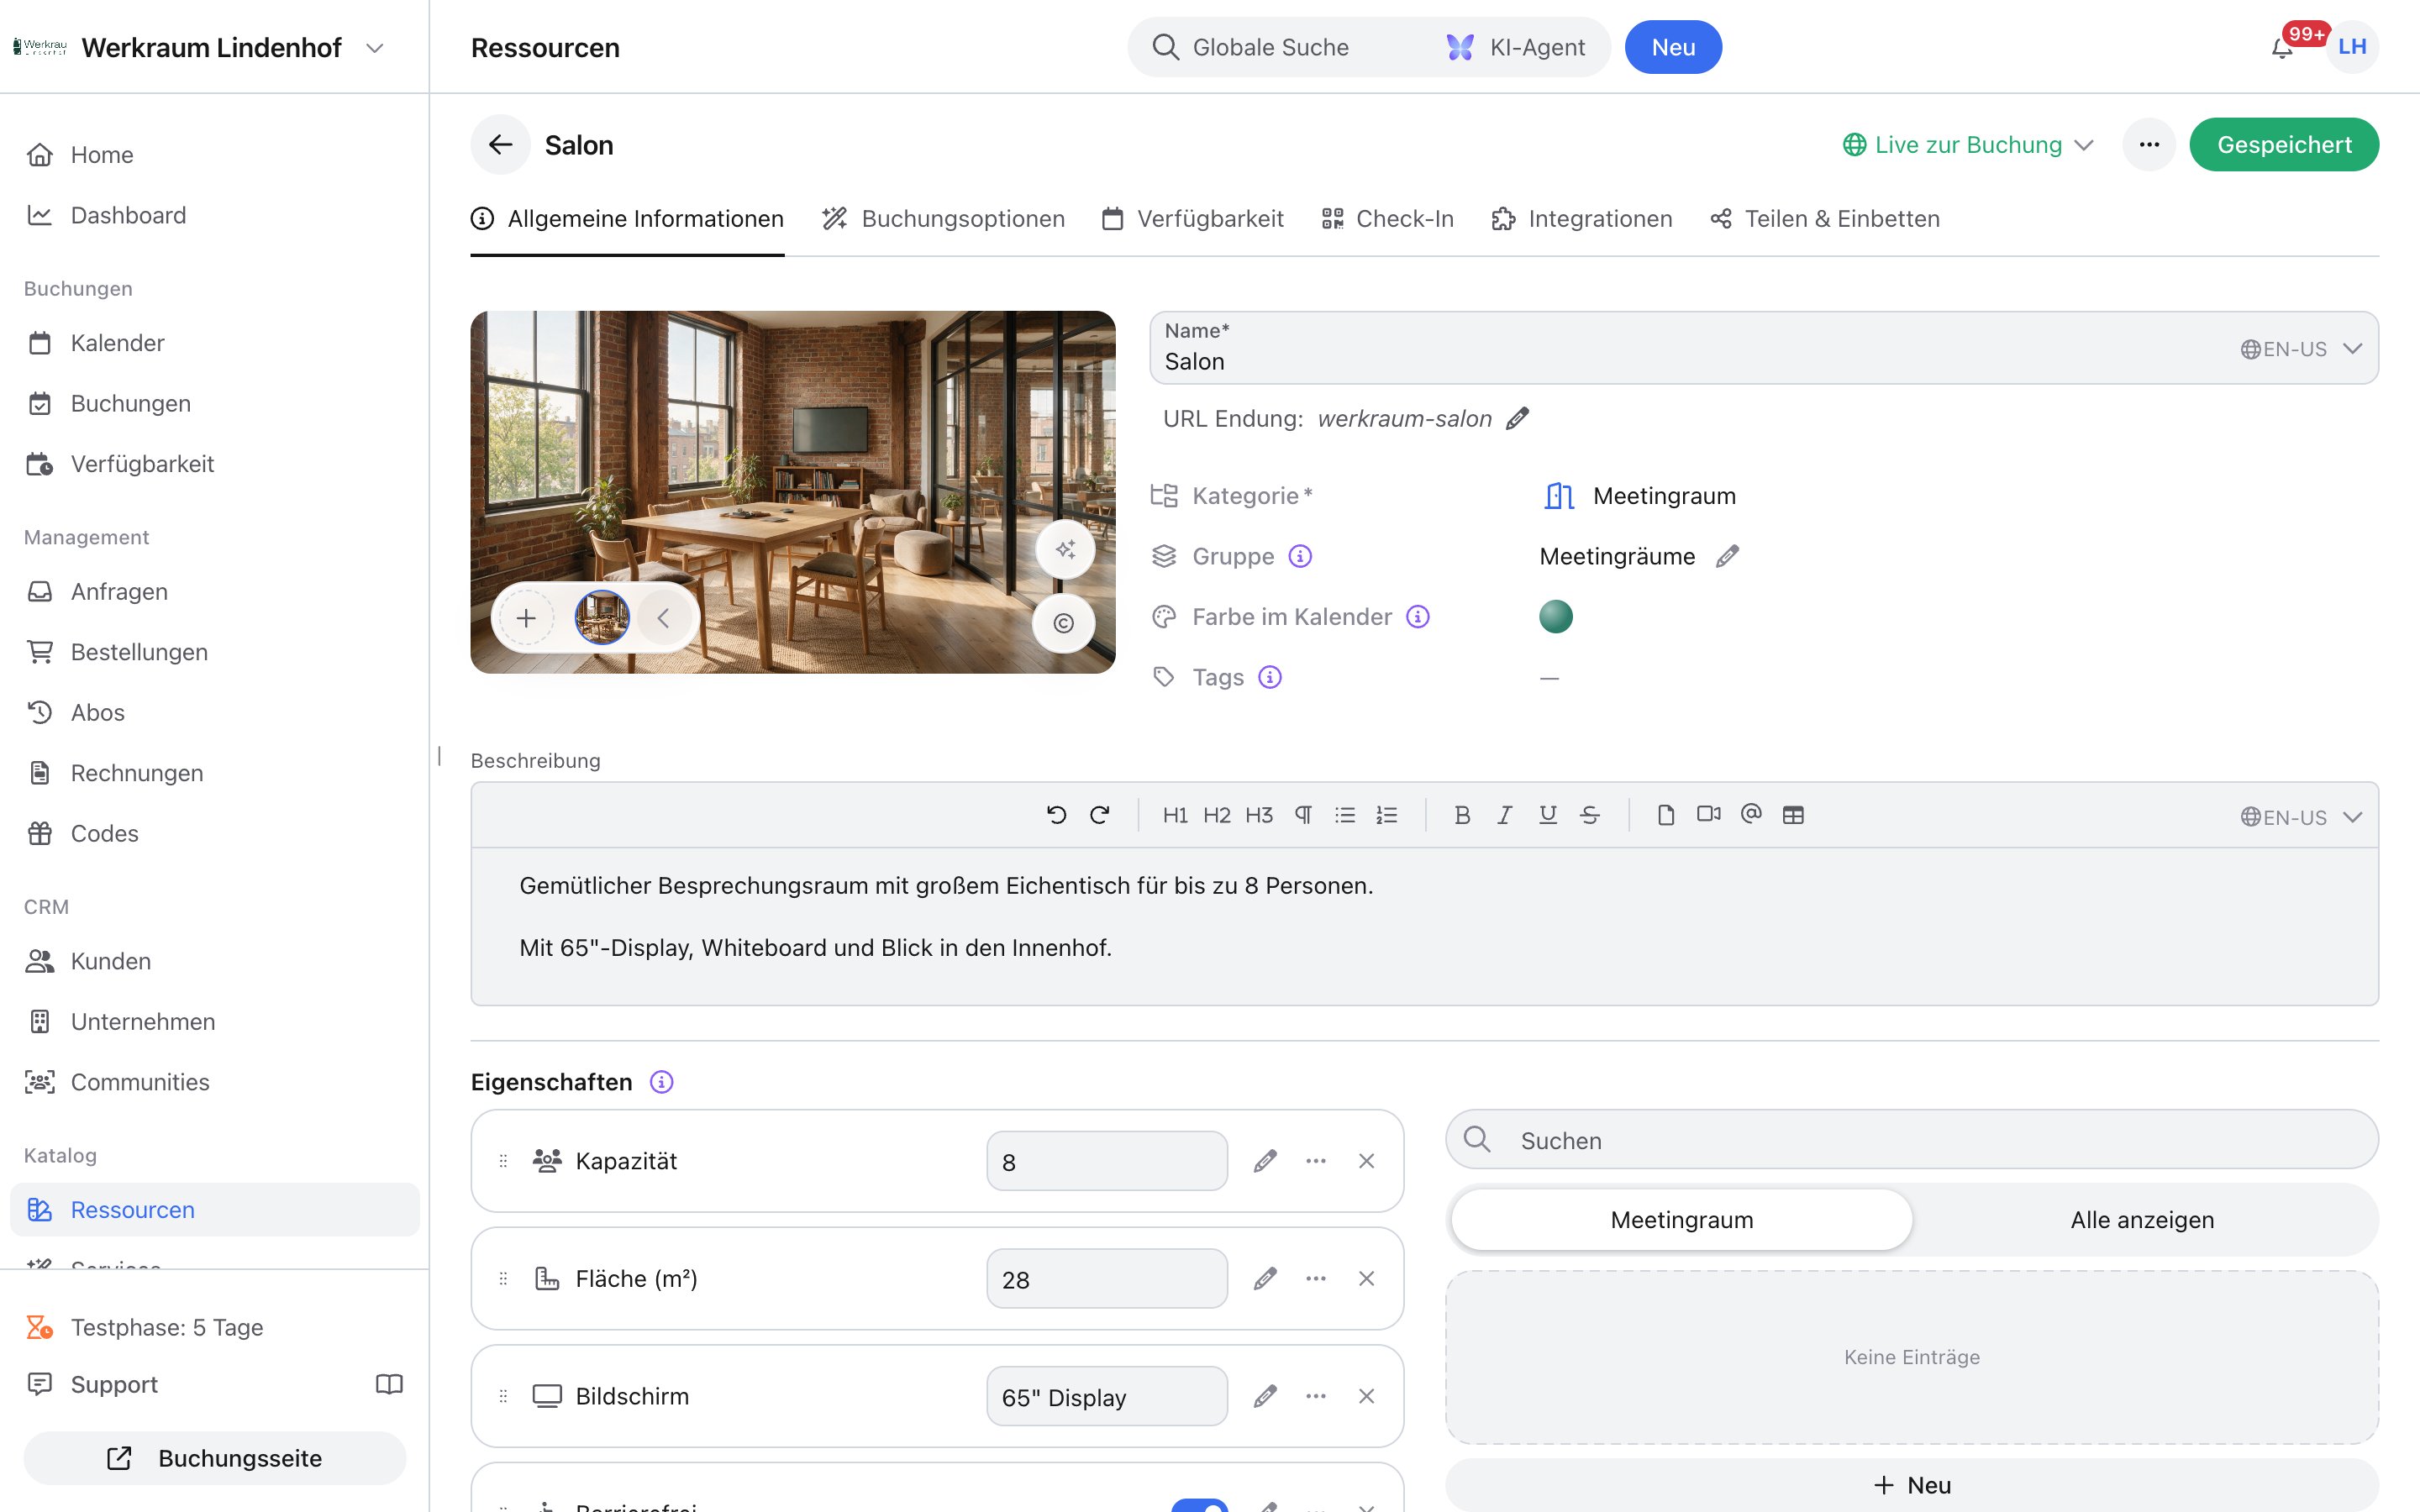
Settings and integrations
Settings sit in collapsible groups, for example General, Inquiries, anny AI, Invoicing, Booking rules, and Share & embed. Apps & Integrations and features moved from the organization settings to Account › Apps & Integrations. You set language and appearance in the user menu, no longer in the profile. Team, invitations, and roles are sections on one page.Booking page
Admin 3.0 is mainly an update of the admin. The booking flow stays. New are the public inquiry page and the quote page. Resources and services appear in the order you set in the admin, no longer alphabetically.Also new
Beyond the calendar and orders, a lot has changed too: a new Check-In, a dark mode, AI maps from your floor plan, Products without an appointment, and notifications in the admin or in the browser.What stays the same
- Existing bookings, orders, invoices, and customers
- Permissions and roles
- Public booking pages, booking options, and availability (flow unchanged)
- Integrations and smart locks, under Apps & Integrations
FAQ
How do I switch between the old and the new admin?
How do I switch between the old and the new admin?
Do I need to change anything myself?
Do I need to change anything myself?
Does anything change for my customers?
Does anything change for my customers?
Do existing bookings change when I adjust a price?
Do existing bookings change when I adjust a price?
Where did the support chat go?
Where did the support chat go?
Where did resource selection in the calendar go?
Where did resource selection in the calendar go?
Why is there no small calendar on the booking detail page anymore?
Why is there no small calendar on the booking detail page anymore?
Where do I set up the columns of a table?
Where do I set up the columns of a table?
Why is my filter gone the next time I open the page?
Why is my filter gone the next time I open the page?
Where do I find integrations and features?
Where do I find integrations and features?
Where did exports and maps go?
Where did exports and maps go?
Where are my add-ons?
Where are my add-ons?
Where do I give feedback?
Where do I give feedback?