

Who is this feature for?
This setup is aimed at IT admins of:- Universities and colleges that authenticate through national research networks.
- Large corporations with a central federation for multiple subsidiaries.
How the setup works
The process consists of two phases: creating the connection in anny and approving it in your system.1
Trigger the connection in anny
- In anny, open the Account settings and switch to the SSO & Security area.
- Click the + Add IdP button.
- Select the Federation option and then click your network (e.g. DFN-AAI).
- Now enter your organization’s Entity ID. Tip: If you use DFN-AAI, you find your Entity ID in the DFN-AAI tool overview. Select the “Identity Provider” area there, search for your organization, copy the “SAML Entity ID”, and insert it in anny.
-
Save the entry in anny. This sends a proactive request to your federation.
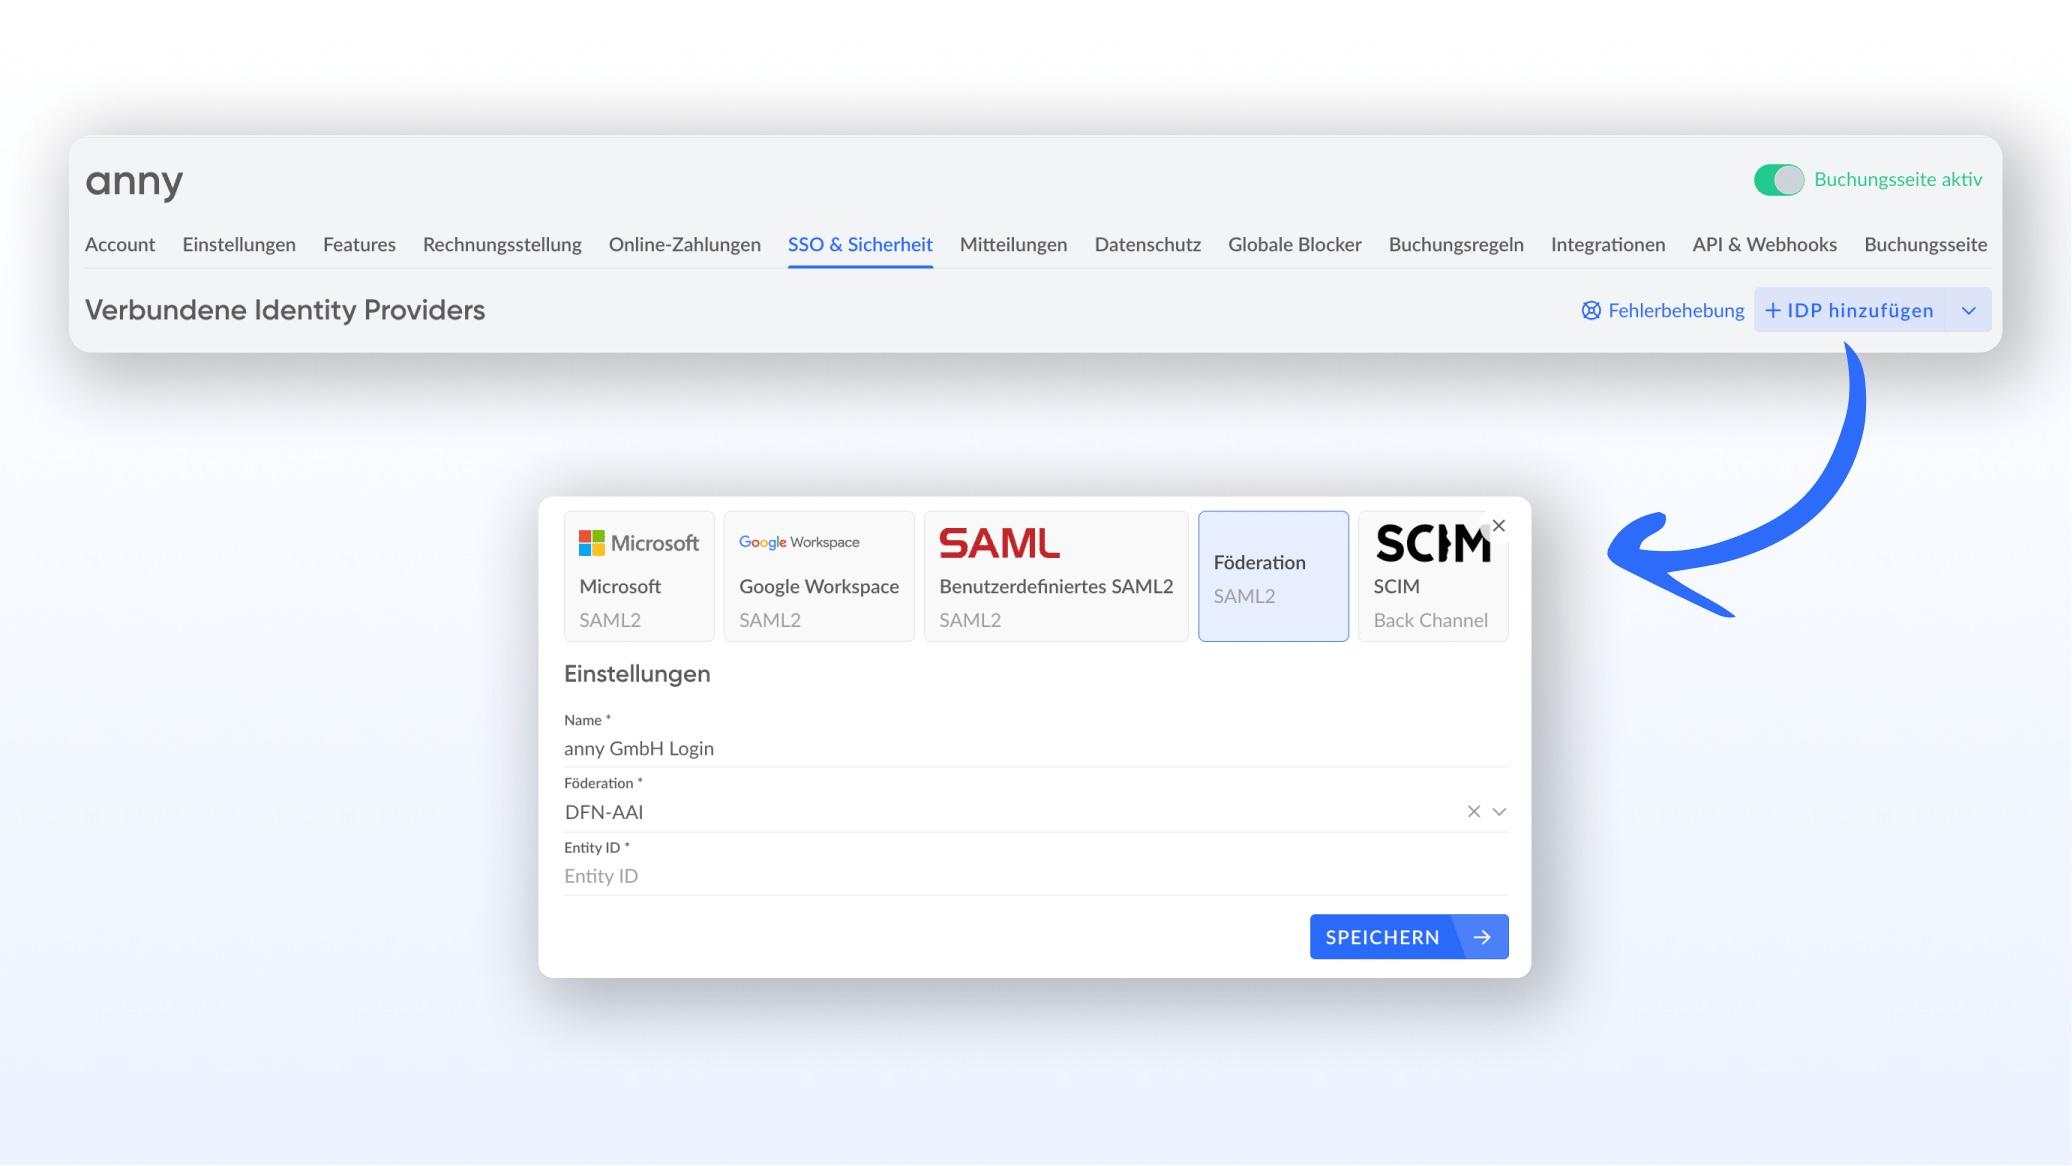
2
Approval in the federation interface
Now switch to the management system of your identity federation to process the request from anny.
- Check the request in the interface As soon as you have triggered the connection in anny, you receive a request from anny on your side (in your federation interface). This request contains anny’s specific Entity ID.
- Note the domain and accept Check the Entity ID. Important: Pay close attention to the domain ending here! Depending on which server your anny account is on, the domain of the Entity ID is either anny.eu or anny.co. Accept the request for the exactly matching domain in your interface.
- Create and release attributes The login is now linked. For anny to create a real user profile from the login, data must be passed during authentication. Create the following attributes on your side and explicitly release them for anny (attribute release):
- Email (Required)
urn:oid:1.2.840.113549.1.9.1orurn:oid:0.9.2342.19200300.100.1.3 - First and last name (Required)
givenName(urn:oid:2.5.4.42) andsurname(urn:oid:2.5.4.4) - Name (Fallback) If first and last name cannot be passed separately by your system, use the
displayName(urn:oid:2.16.840.1.113730.3.1.241) as an alternative.
Troubleshooting
Users can log in but have empty profiles in anny
Users can log in but have empty profiles in anny
This means the login works, but your federation is not sending any attributes to anny. Check in your interface whether you have actually released the attributes (such as email or name) for the anny application.
The request is not found
The request is not found
Make sure you search for the exact Entity ID in the interface, and confirm with anny Support whether the request was made for .eu or .co.