

The Outlook add-in must have been provided by your IT admin in Exchange. If you can’t see it, contact your IT team.
Make a booking
1
Create a new appointment
Open Outlook and click New appointment. Set your desired time as usual.
2
Open the anny add-in
In the appointment pop-up, click the three dots at the top right and select anny. The add-in opens on the right-hand side.
3
Check available resources
You’ll see all resources available for the selected time period (e.g. meeting rooms, workspaces).
4
Select a room
Click Select on the resource you want. The room is added as the location to the Outlook appointment.
5
Send the appointment
Click Send. Your booking is complete.
Register visitors
You register external guests as visitors directly in the appointment. That works together with a room booking and also without a room. Your admin must have set up a resource in the visitor registration category. Setup details are in the article Outlook Add-In.1
Add participants to the appointment
Create the Outlook appointment and add the guests as usual. Set the time you want.
2
Open the anny add-in
In the appointment pop-up, click the three dots at the top right and select anny.
3
Set attendance
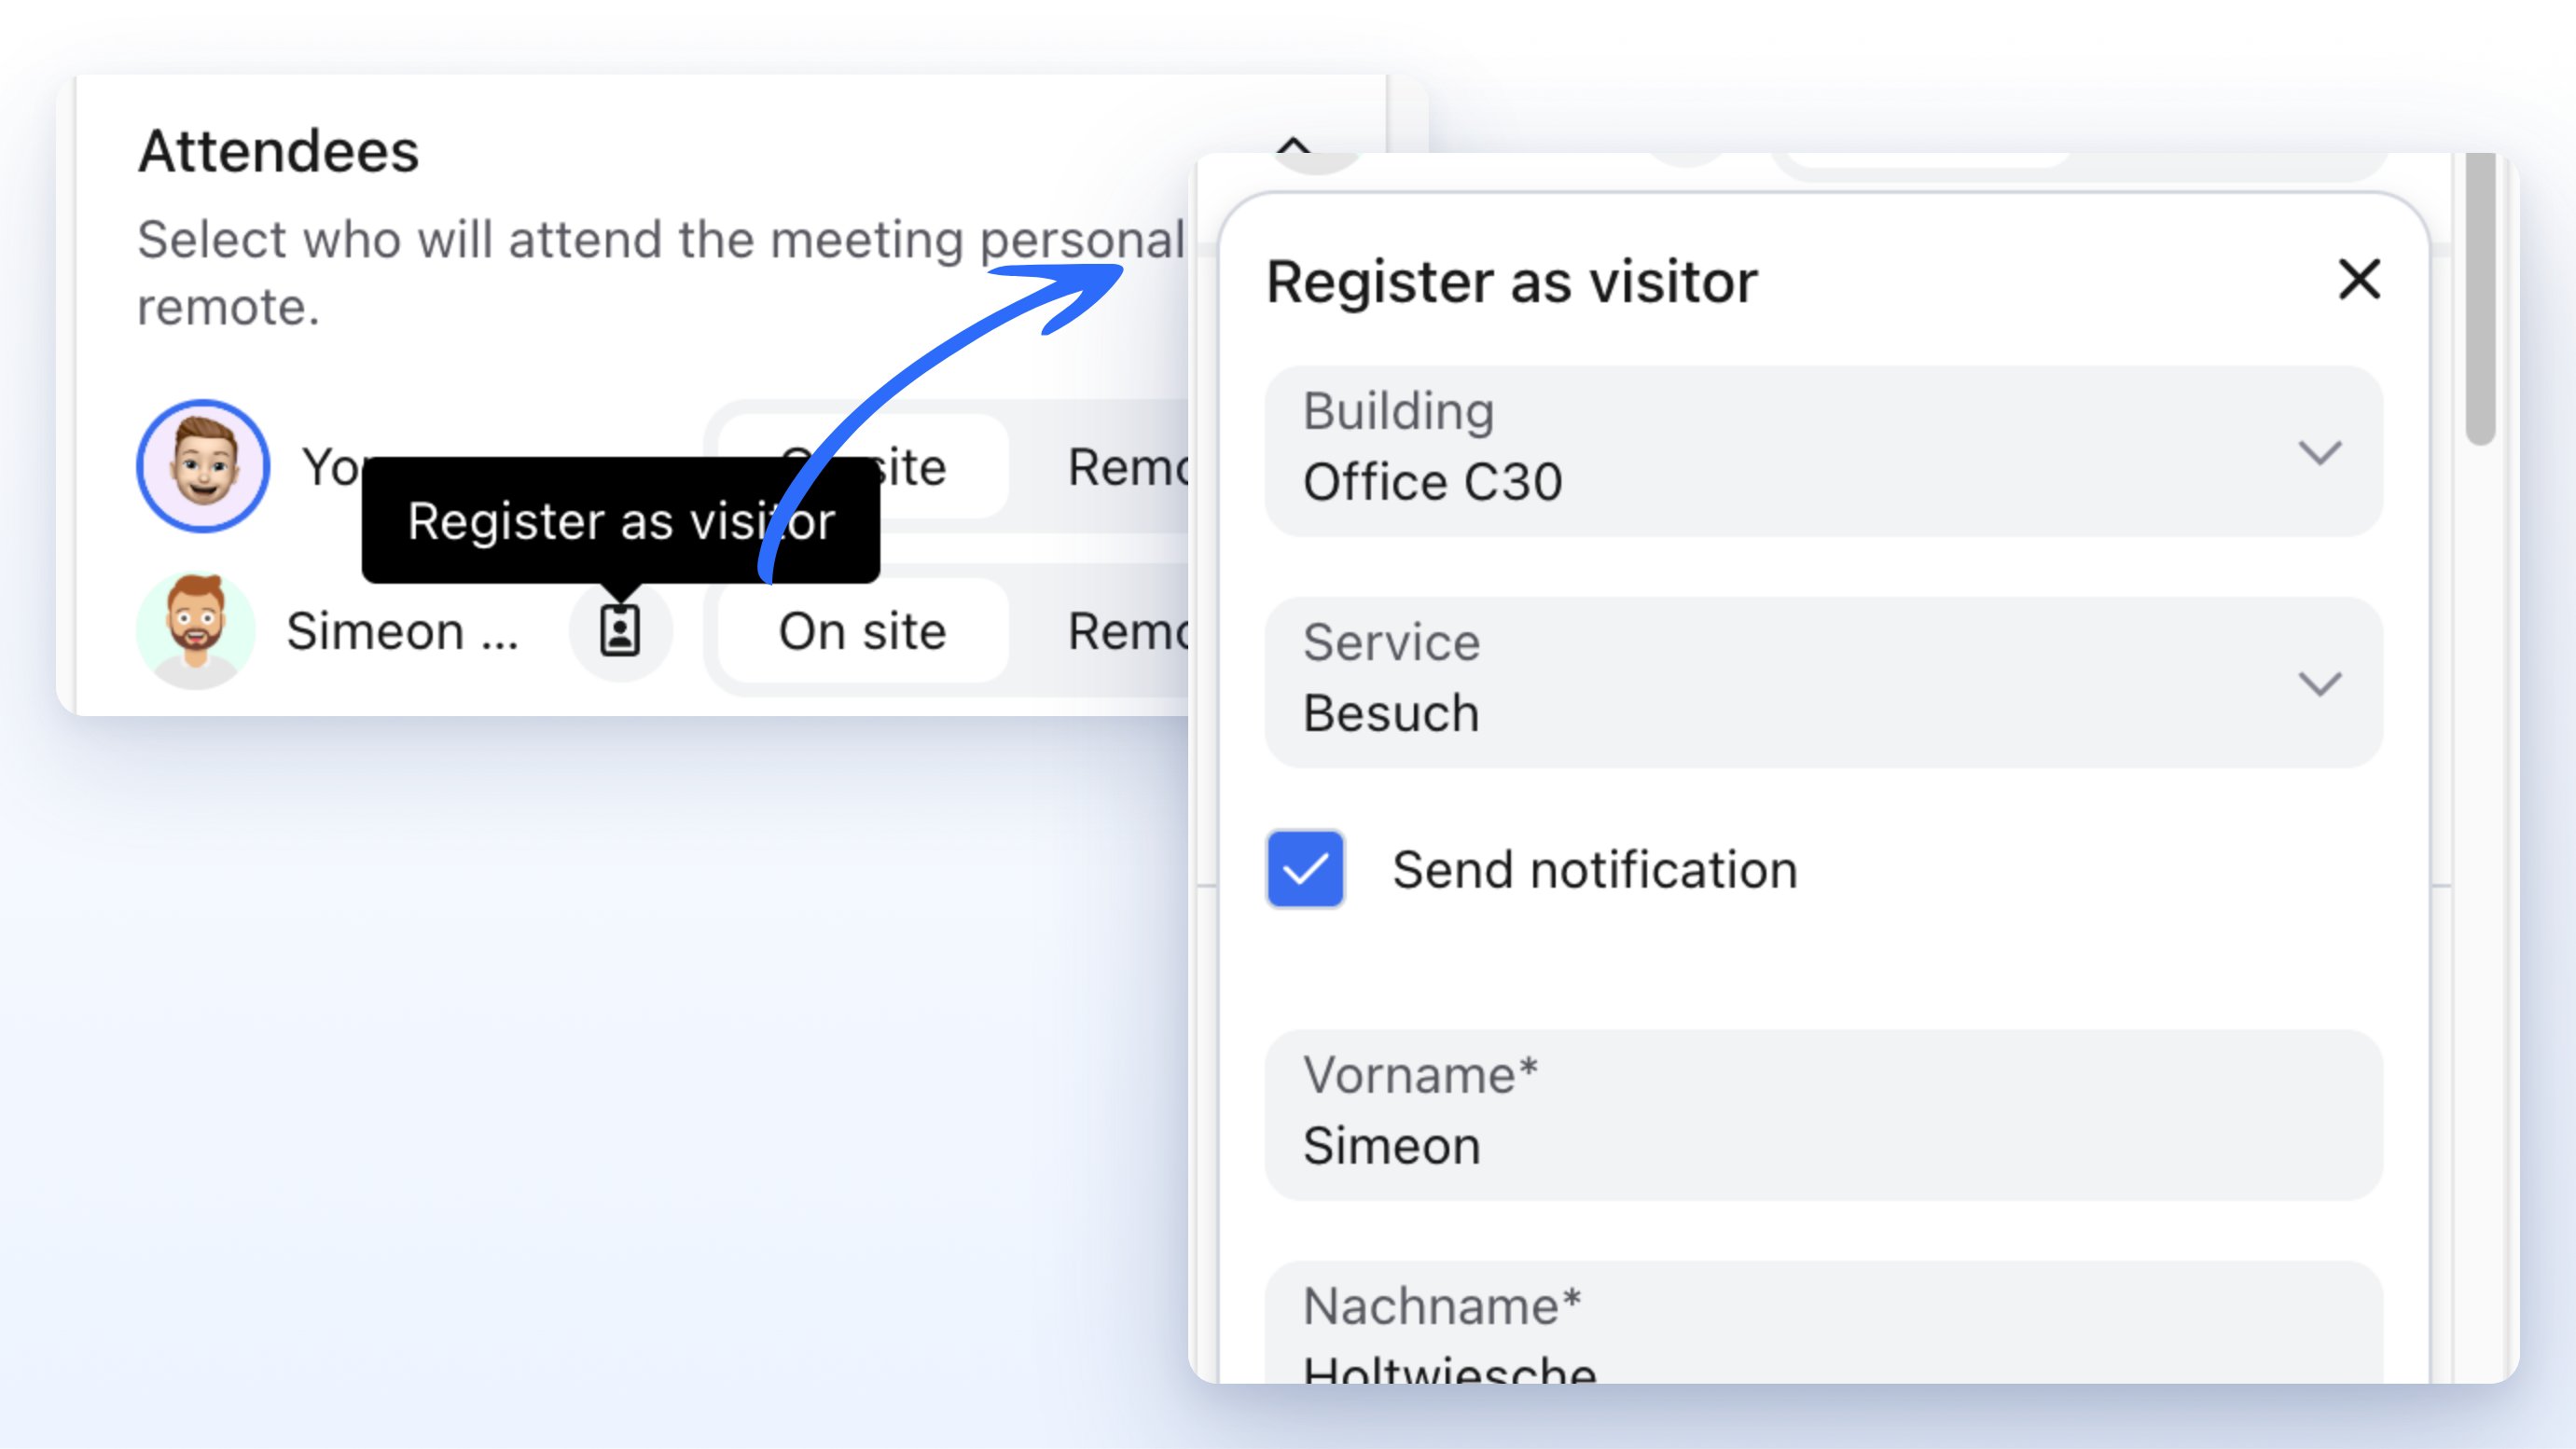
Under Attendees you see the note Select who will attend the meeting personally or remote. Set the person to On site.
4
Open registration
Next to the person, click Register as visitor.
5
Choose building and service
Select Building and Service. If the appointment is outside availability, No visitor registration is available for this meeting. appears.
6
Check the details and apply
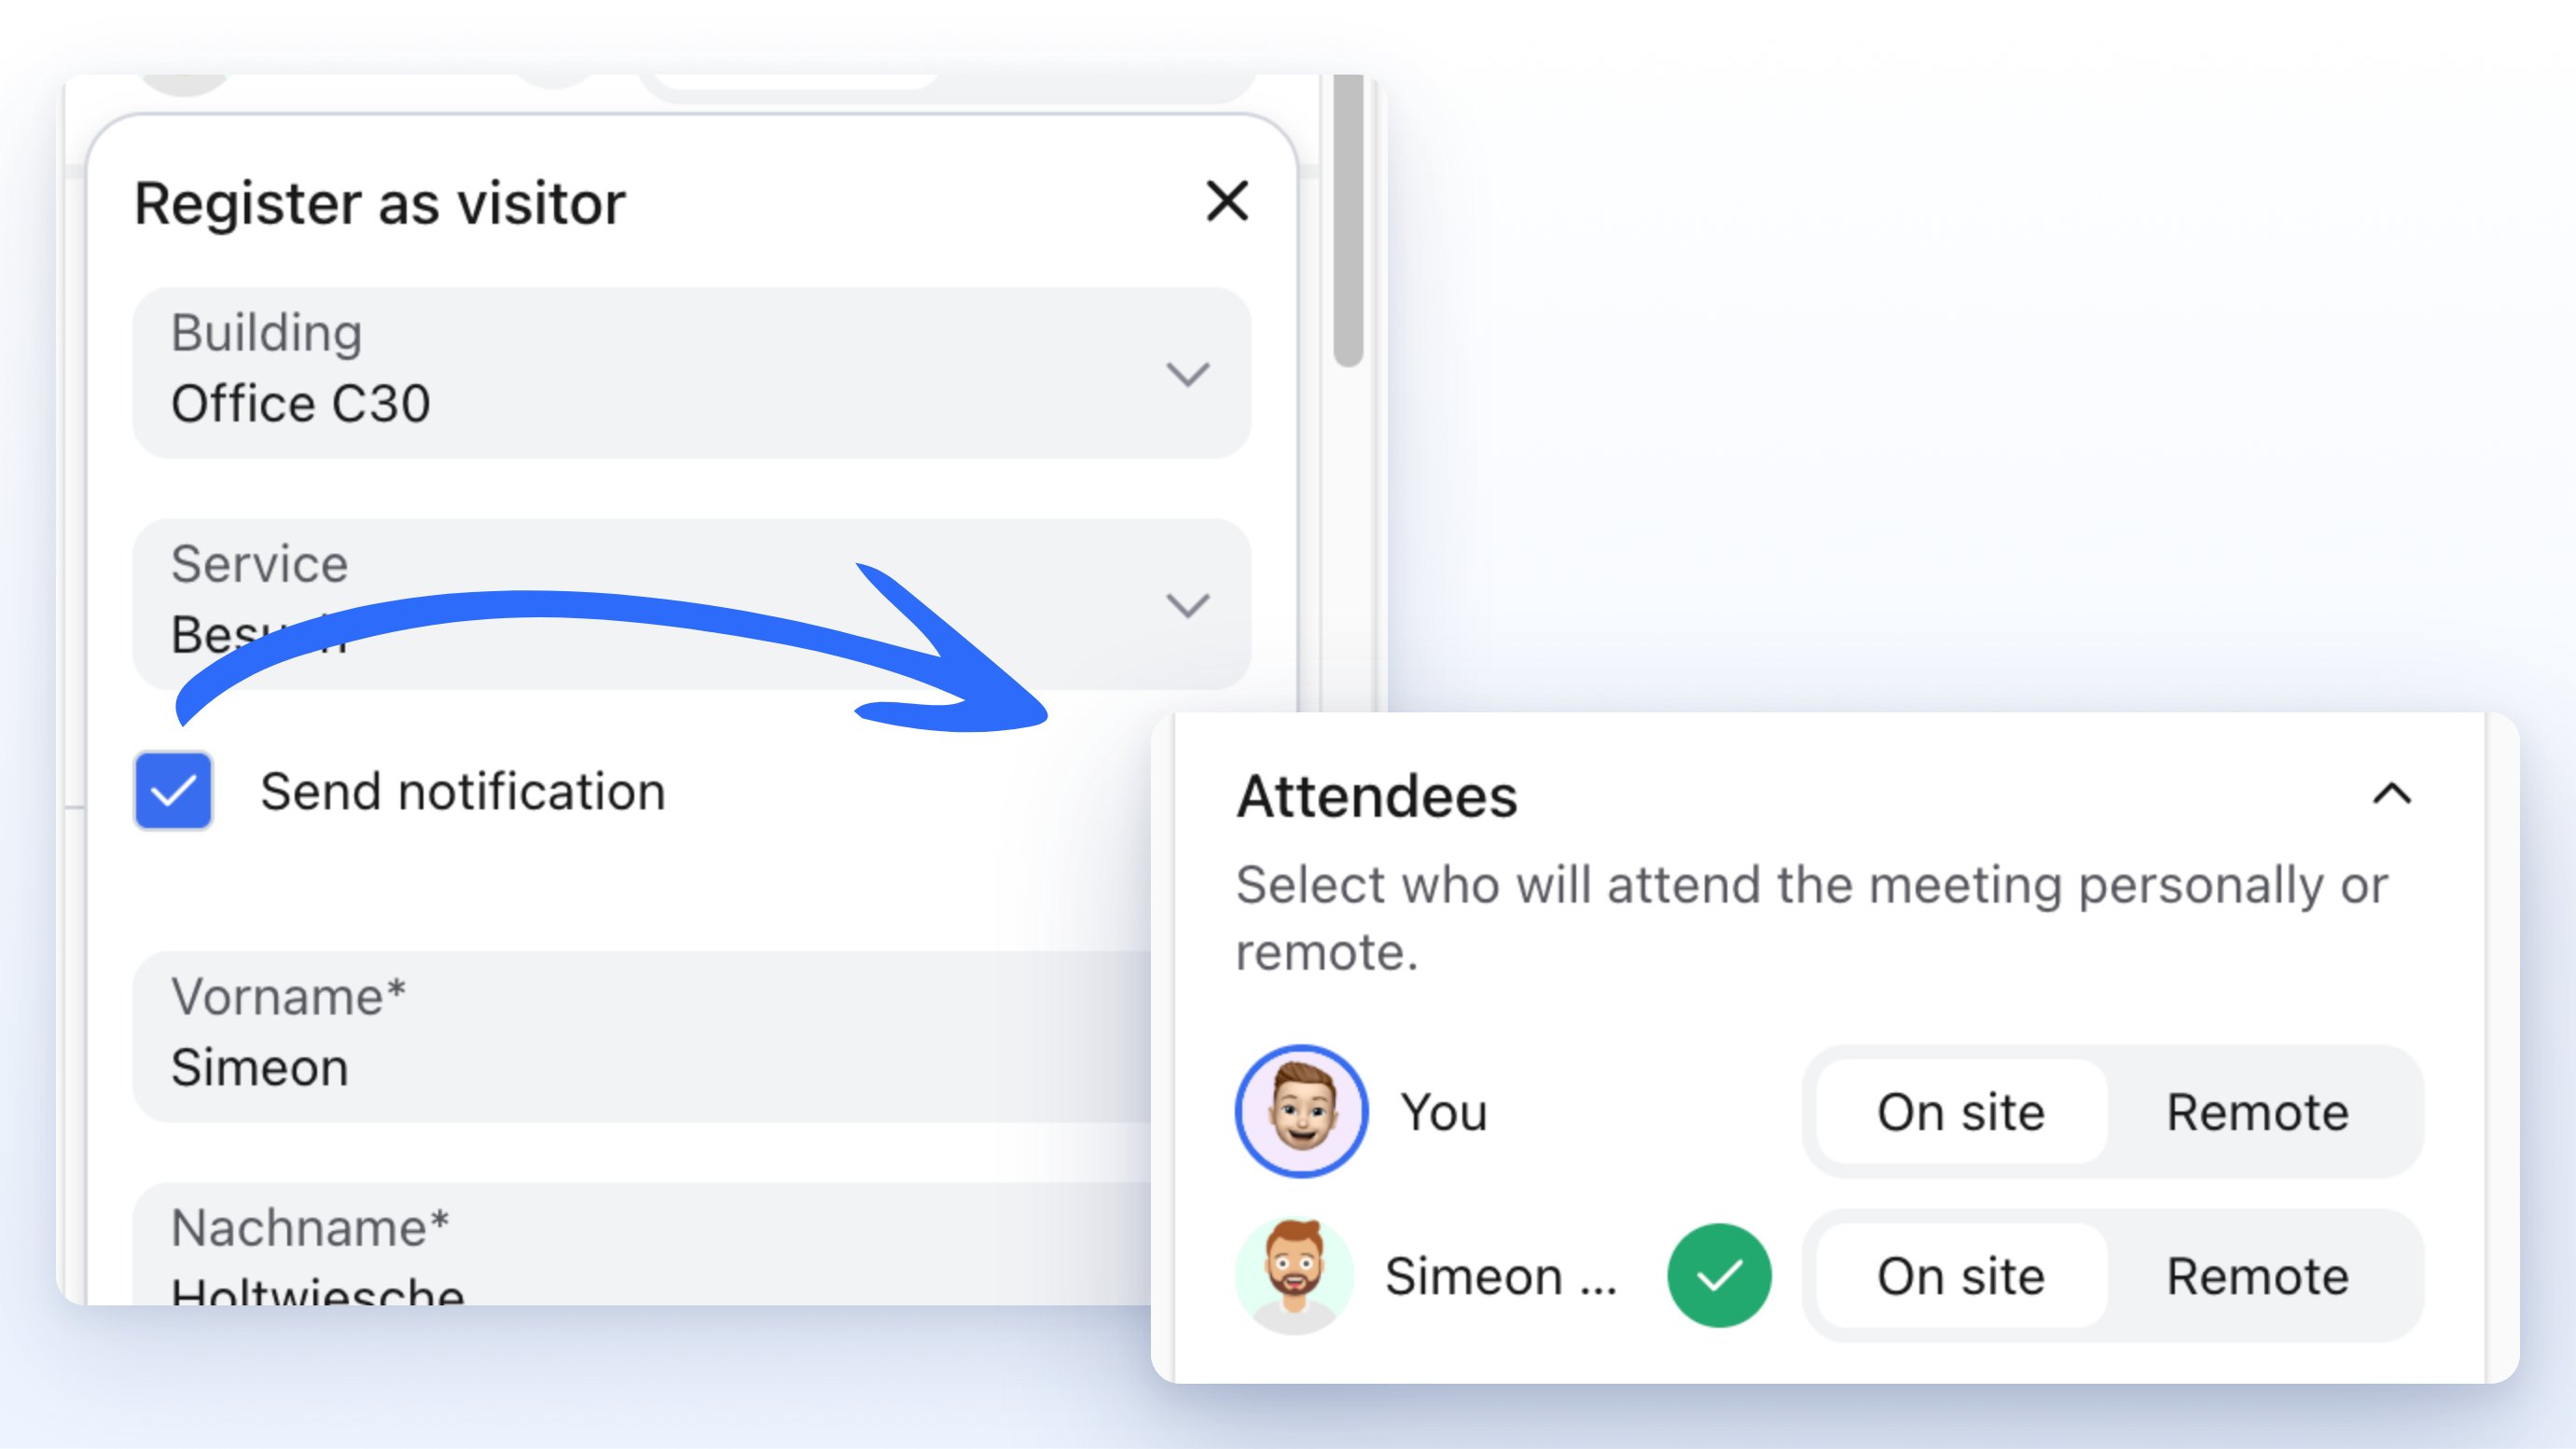
Leave Send notification enabled if the person should receive an anny confirmation. Check First name, Last name and any other fields. Click Apply.
7
Send the appointment
The icon changes to Visitor registration ready. Click Send. Only then is the registration confirmed in anny.
Filter options
In the add-in, you can refine your search:- Adjust the time period: Under “Find booking”, choose between Exact match, Same day or Within the week.
- Filter by properties: Open the filter icon to search by equipment, capacity or location.
Login
You can log in to the Outlook add-in with your SSO (single sign-on) or your anny account. The login is saved, so you don’t have to sign in again for every appointment.Good to know
- Moving an appointment: When you move your Outlook appointment, the anny booking changes with it automatically in real time.
- Deleting an appointment: Deleting the appointment also cancels the booking in anny.
- Incognito booking: If you send a private Outlook appointment through the add-in, the booking is created in anny as an incognito booking (not visible to other admin users).
I can't see the anny add-in in Outlook
I can't see the anny add-in in Outlook
The add-in must be provided by your IT admin in Exchange or the M365 Admin Center. Ask your IT team whether “anny bookings” is installed.
My appointment moves, but the booking doesn't
My appointment moves, but the booking doesn't
Make sure you added the room through the anny add-in (not through the native Outlook room search). Only rooms booked through the add-in sync.
I can't see any available resources
I can't see any available resources
Check whether the selected time period is correct. If no resources are shown, they may all be fully booked for that time period. Adjust the time filter.
Can I book for others through the add-in?
Can I book for others through the add-in?
No, the add-in always books on behalf of the logged-in user. For bookings on behalf of others, use the Connected Persons feature on the booking page.
Can I register a visitor without booking a room?
Can I register a visitor without booking a room?
Yes. Add the person to the appointment, set them to On site and choose Register as visitor. A room is not required.
I can't see the icon to register
I can't see the icon to register
The icon only appears next to other participants, not next to You. The person must be set to On site. Your admin must also have set up a resource in the visitor registration category.