

- Book rooms and desks directly when creating an Outlook appointment
- Register visitors for meetings, even without a room booking
- Automatically create private appointments as incognito bookings
Typical use cases
How the Outlook Add-In works
The add-in is provided as a Microsoft 365 app via the M365 Admin Center. After installation, it appears automatically in Outlook and activates when an appointment is sent (OnAppointmentSend event). Communication runs through the anny API. Users authenticate with their Microsoft account. The add-in requires read access to calendar entries and basic profile information.Connecting the Outlook Add-In
Requirements
Microsoft side:- Microsoft 365 admin rights (for organization-wide deployment) or Exchange admin rights (for on-premise)
- Outlook version 2206 (build 15330.20196) or newer
- Hostnames allowed in the firewall:
outlook.anny.co,cdn.anny.co,auth.anny.co,b.anny.co,api.anny.co,select.anny.eu,appsforoffice.microsoft.com
- An active anny account with at least one bookable resource
Installation via the M365 Admin Center
1
Open the M365 Admin Center
Go to admin.microsoft.com and navigate to Settings → Integrated apps.
2
Search for the anny add-in
Click Get apps and search for anny bookings. Click Get it now.
3
Configure the deployment
Choose who the add-in should be deployed to (the entire organization, specific groups or individual users) and confirm the deployment.
4
Accept the permissions
Accept the required permissions. The add-in requires read access to calendar entries, profile information and permission to read and write appointment items.
Installation via Exchange (on-premise)
1
Download the manifest
Download the add-in manifest: https://b.anny.co/integrations/outlookAddIn/manifest
2
Adjust the mailbox version
If the installation fails, replace the mailbox version
1.12 with 1.1 in both places in the XML file:3
Upload the manifest in the Exchange Admin Center
Upload the adjusted XML file in the Exchange Admin Center as an add-in for your organization.
Permissions in detail
Setting up visitor registration
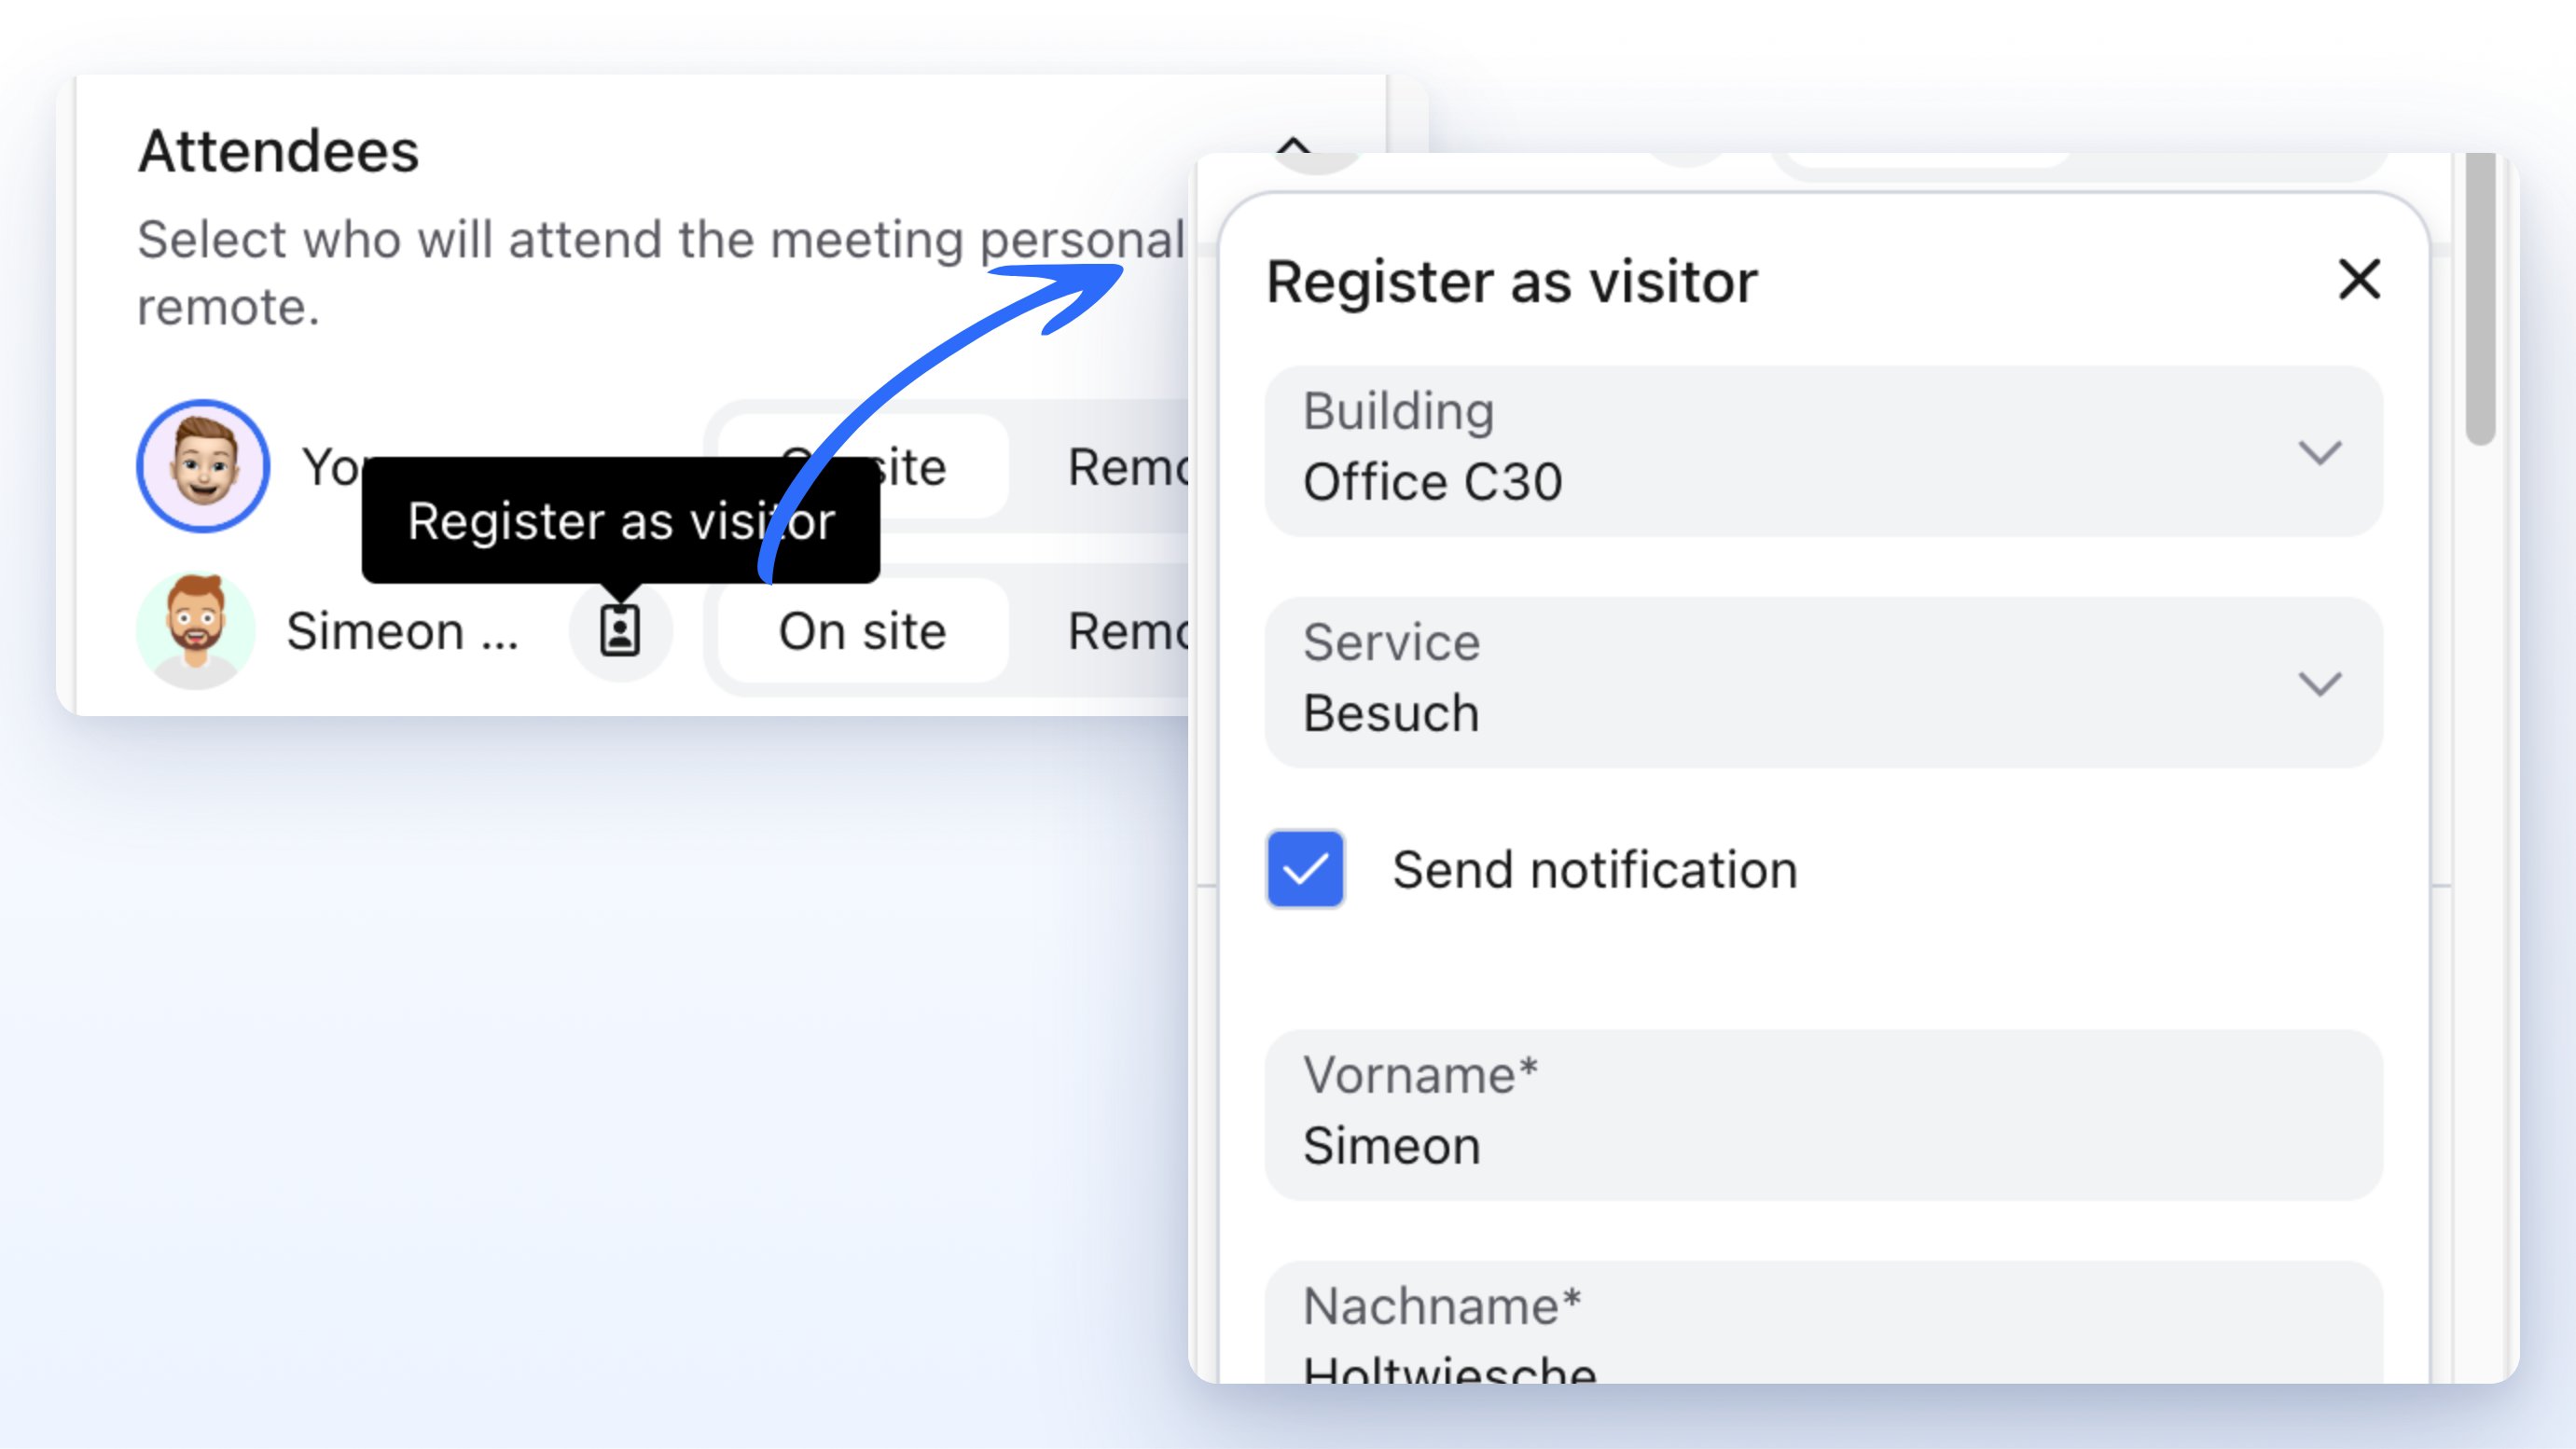
To register visitors directly from the Outlook Add-In, you need at least one resource in the visitor registration category with at least one booking option. As soon as such a resource exists in your account, the Register as visitor icon appears next to participants in the add-in. A room booking is not required for that. Set the resource up so it matches your reception:1
Create the resource and booking option
Create a resource in the visitor registration category and add at least one booking option. Availability must cover the times when meetings take place.
2
Prepare check-in and the host
Enable check-in and the host query if guests should check in at the terminal and hosts should be notified. The full reception process is described in Visitor management.
3
Time forms and signatures
Set legal documents and custom forms to Later (at check-in) if signatures and extra details are only needed on site. In the Outlook overlay these fields stay optional. At check-in they become required if they are still empty.
Limitations
- The add-in only works with Outlook version 2206 (build 15330.20196) or newer
- On-premise installations may require a manual adjustment of the mailbox version in the manifest
- Visitor registration only appears if at least one resource in the visitor registration category has a booking option
- You can only register participants set to On site. With Remote, the icon is disabled. An existing registration is removed
- The organizer (host) has no registration icon
- If you change the appointment time, visitor registrations that have not been sent yet are cleared and must be applied again
- Rescheduling by an appointment owner other than the original booker can lead to new bookings instead of changes
Removing the add-in
1
Open the M365 Admin Center
Go to admin.microsoft.com and navigate to Settings → Integrated apps.
2
Select the anny add-in
In the list of integrated apps, search for anny bookings and click it.
3
Remove the add-in
Click Remove and confirm the uninstallation. The add-in is removed for all users in the organization.
FAQ
Does every user have to install the add-in themselves?
Does every user have to install the add-in themselves?
No. When deployed via the M365 Admin Center, the add-in becomes available automatically for the selected users or the entire organization.
Does the add-in work with Outlook in the browser?
Does the add-in work with Outlook in the browser?
Yes. The add-in is compatible with Outlook for Windows, Mac and Outlook on the web, provided the minimum version is met.
Can I register visitors without booking a room?
Can I register visitors without booking a room?
Yes. As soon as a resource in the visitor registration category exists, you can register participants set to On site. A room in the same appointment is optional.
When do visitors fill in forms or sign documents?
When do visitors fill in forms or sign documents?
You complete required booking fields in the add-in. Documents and forms set to Later (at check-in) stay optional there. If they are still missing, they are requested at check-in.
What happens to private appointments?
What happens to private appointments?
Private appointments can be created as incognito bookings in anny. This way they are not shown visibly to other users in anny.
Does the add-in work on .eu and .co?
Does the add-in work on .eu and .co?
Yes. The add-in works with both anny instances. Users do not necessarily have to be in the cloud.
Troubleshooting
The add-in is not shown in Outlook
The add-in is not shown in Outlook
Check whether your Outlook version is at least 2206 (build 15330.20196). Make sure the add-in was deployed for your user group in the M365 Admin Center. With firewall restrictions, the hostnames
outlook.anny.co, cdn.anny.co, auth.anny.co, b.anny.co, api.anny.co, select.anny.eu and appsforoffice.microsoft.com must be allowed.The installation in Exchange fails
The installation in Exchange fails
In Exchange environments, the mailbox versioning is different. Replace the mailbox version
1.12 with 1.1 in both places in the manifest and try the installation again.The visitor badge does not appear in the participant view
The visitor badge does not appear in the participant view
The Register as visitor icon only appears next to other participants, not next to you as the host. The person must be set to On site. Your account also needs at least one resource in the visitor registration category with a booking option. A room booking is not required for that.