> ## Documentation Index
> Fetch the complete documentation index at: https://docs.anny.co/llms.txt
> Use this file to discover all available pages before exploring further.
# Embed the anny Booking Page as a Widget on Your Website
> Embed your booking page or single resources on your website and give customers a seamless booking experience in your design.
A website of your own is a given for almost every offer today. The anny widget lets you embed your booking page or individual resources right where your customers already are. They don't have to leave your website to book.
Technically, this works through an iframe that you add in two steps: first a global script, then the actual component at the position you want. You configure the widget once in anny and adapt it to your design. Your website then always shows the current status.
## What you will have set up at the end
* The global widget script is added to your website
* You have configured the widget at organization or resource level
* The design is adapted to your corporate identity
* The widget is placed at the desired position and tested
## Step 1: Choose the widget level and type
You can embed the widget at two levels. First decide what you want to show.
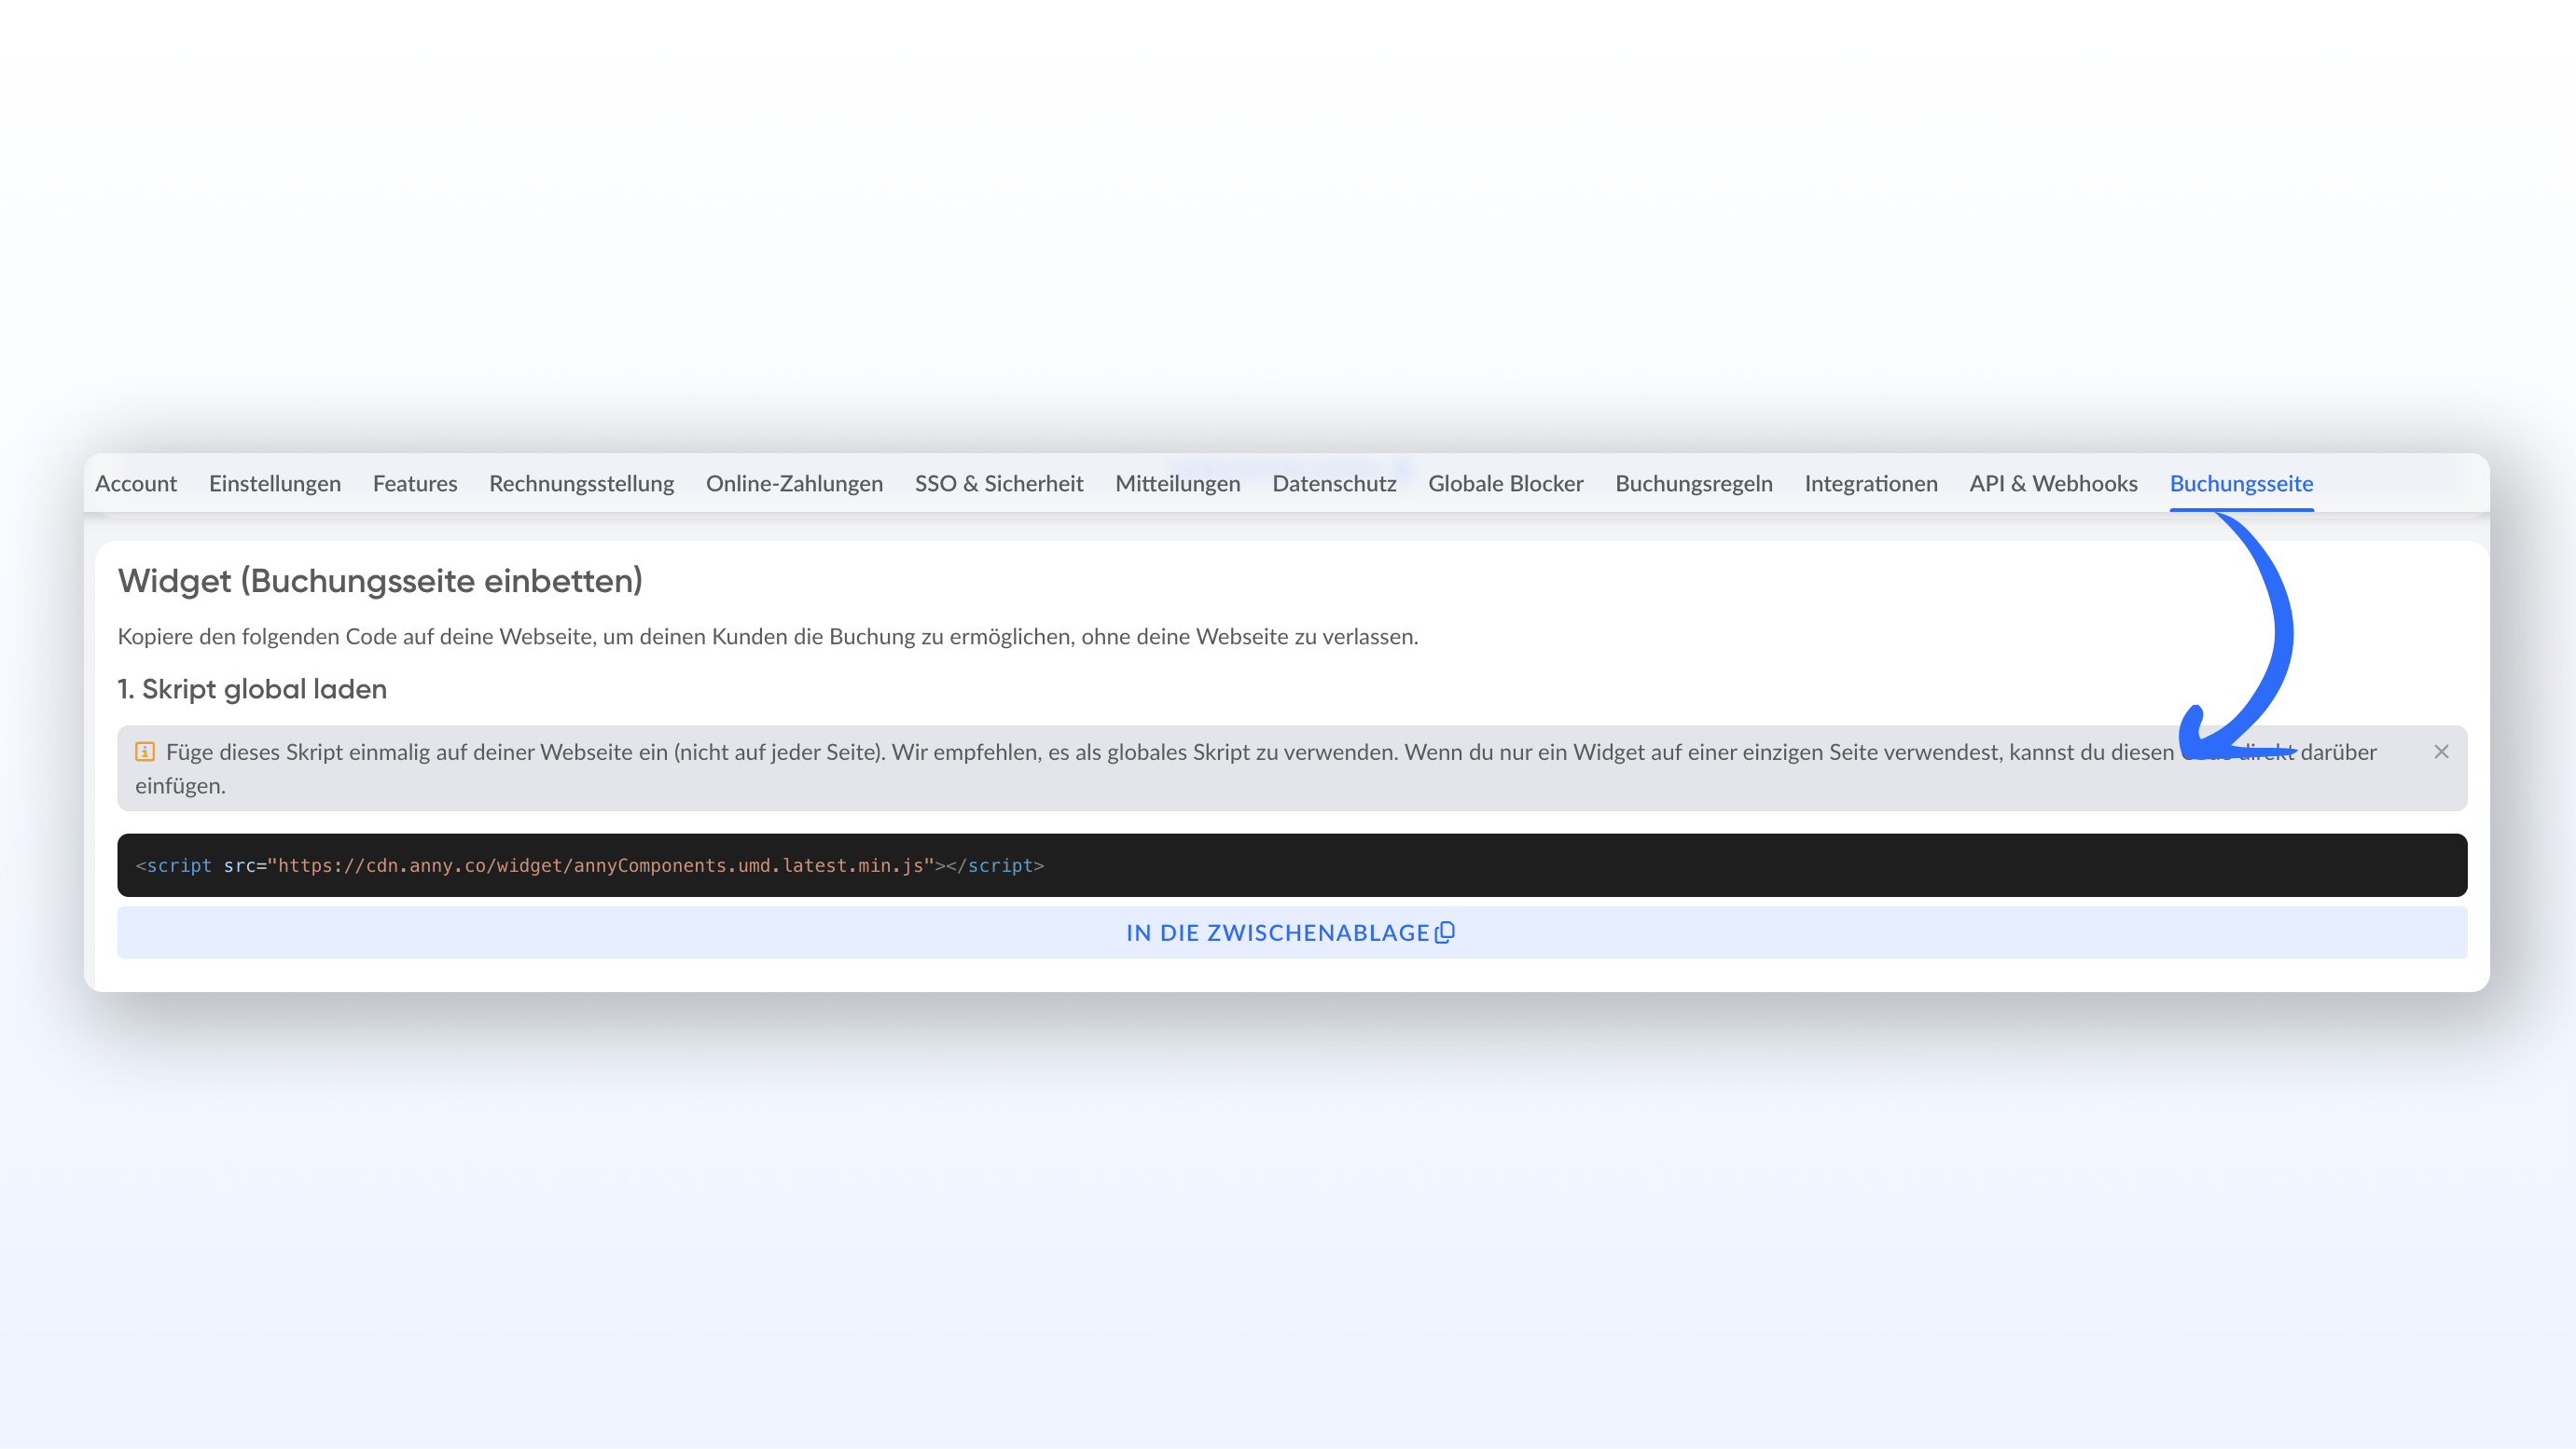
**Entire booking page** (Organization → Settings → Booking page). Useful when you have several resources that should be searchable. This is also where you configure global components such as the login button and the cart button.
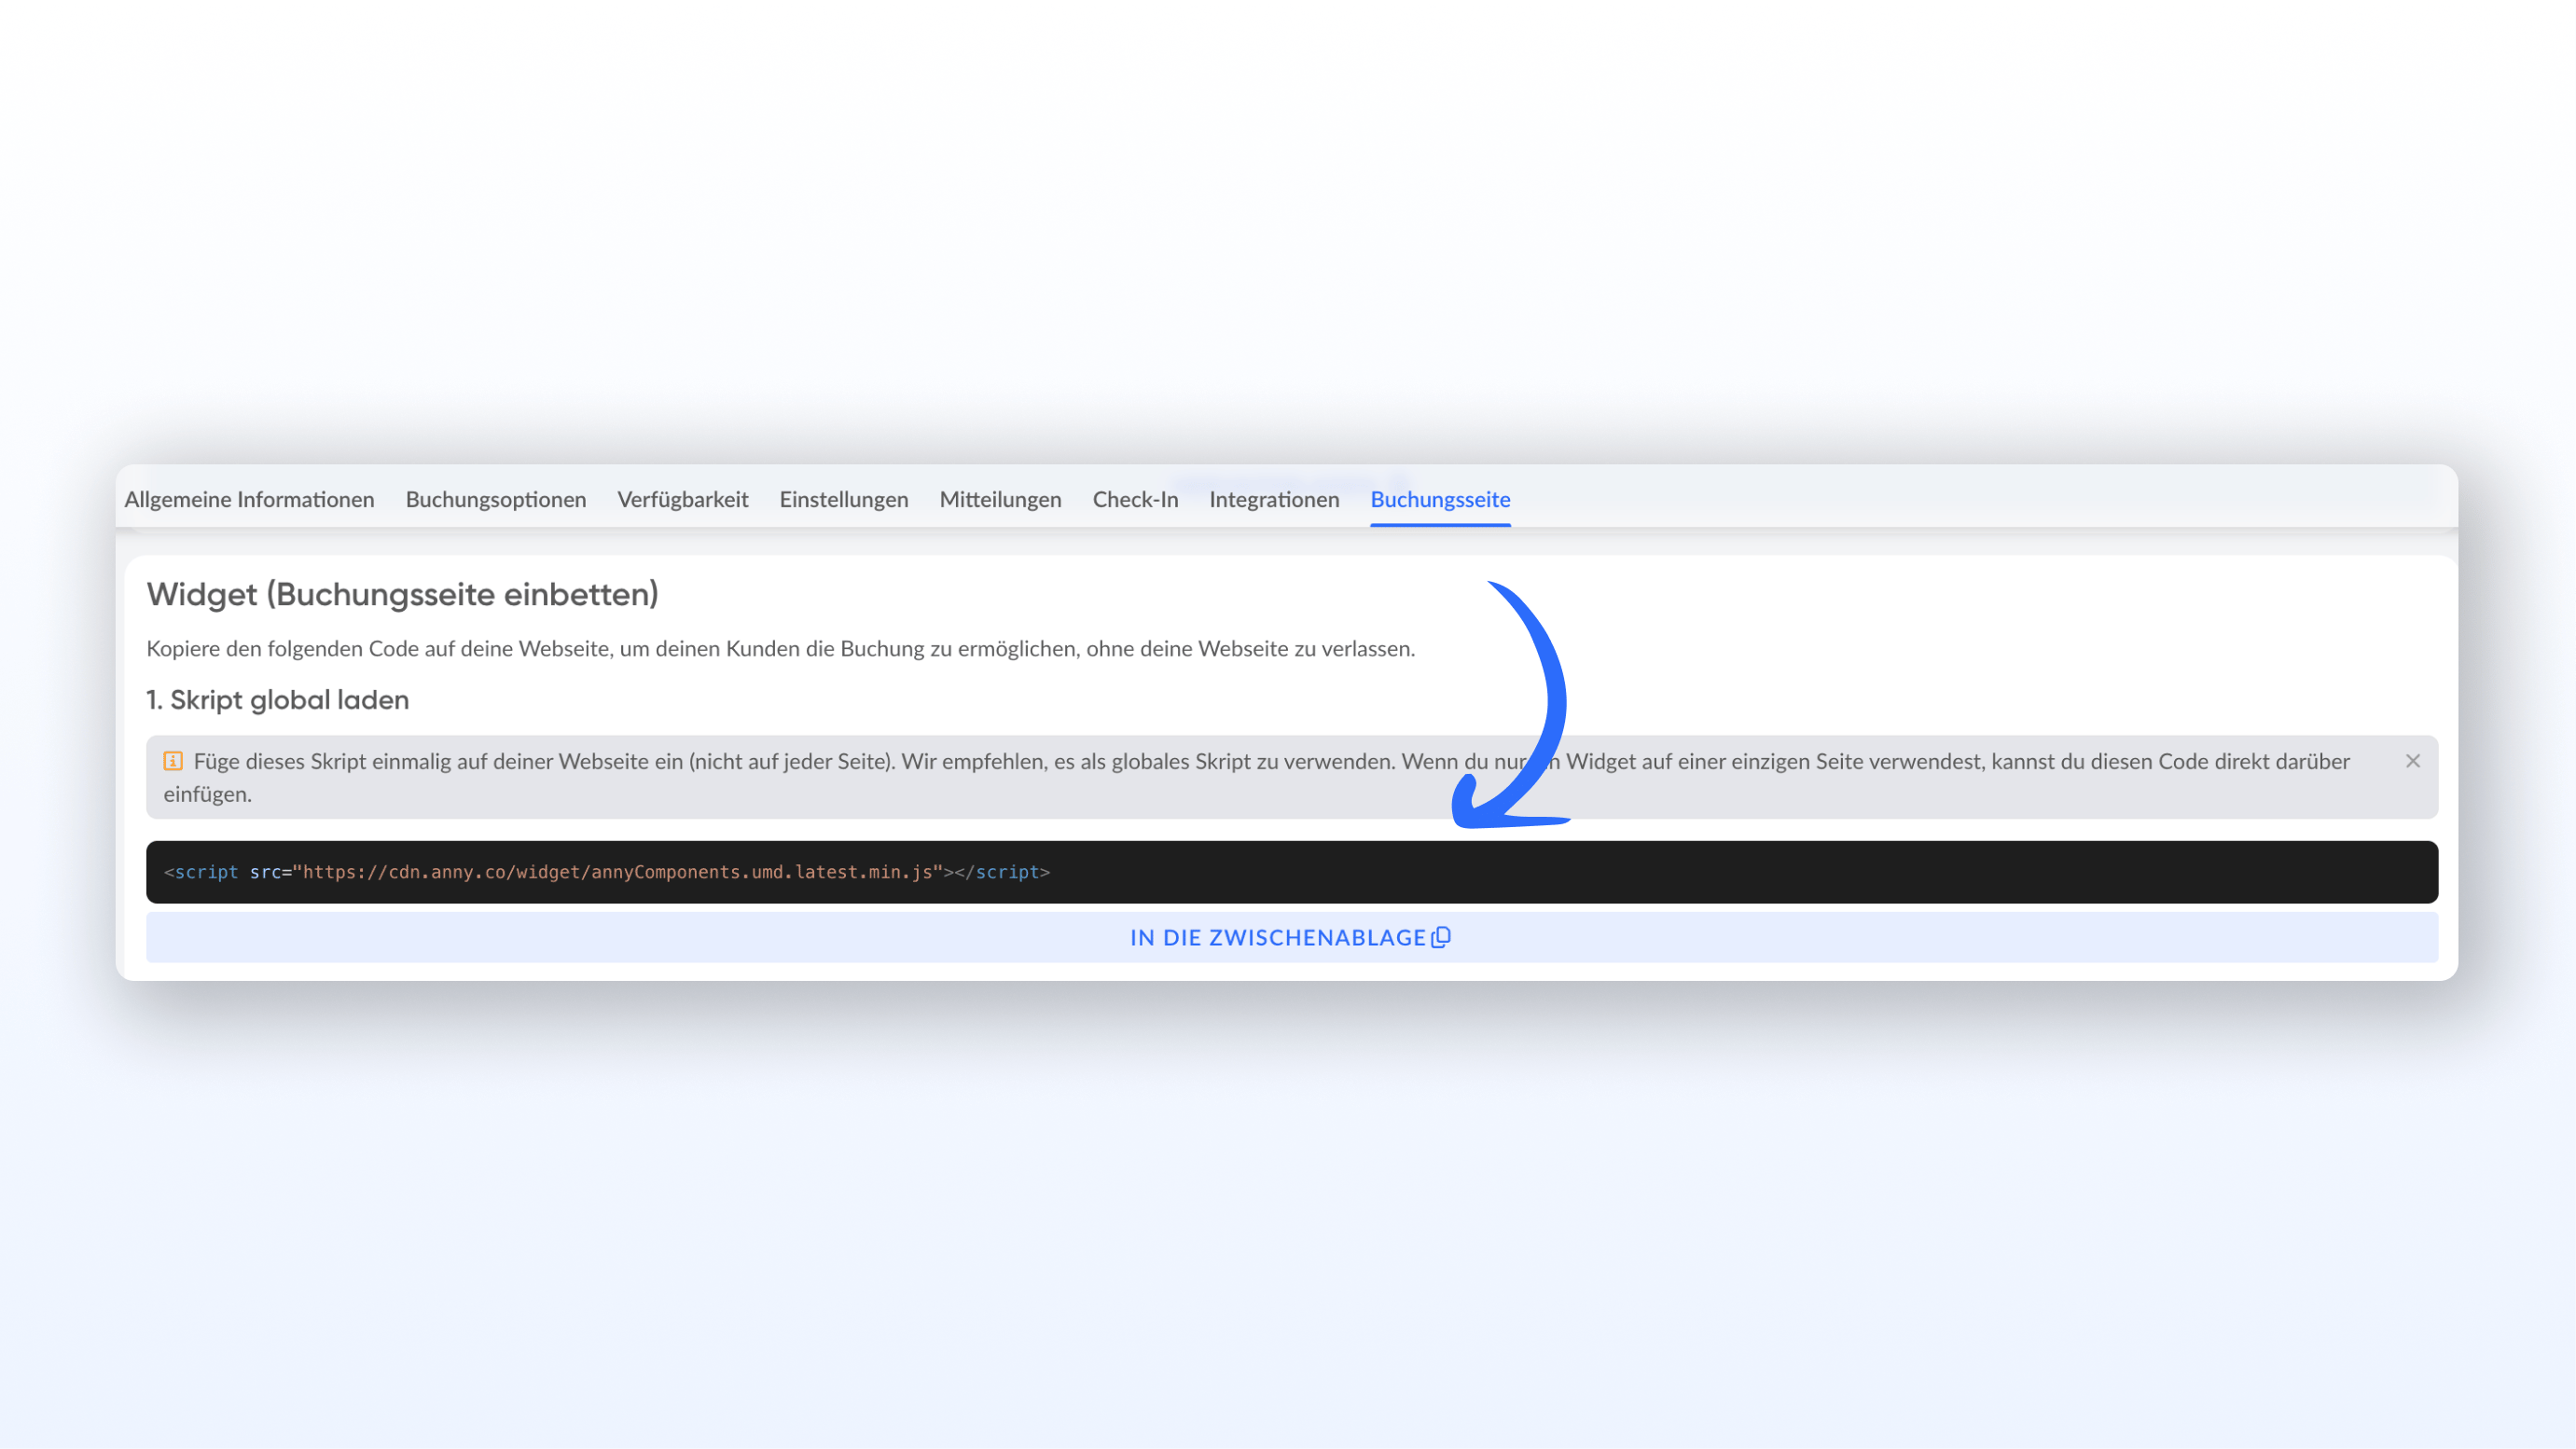
 **Single resource** (Resources → select resource → Booking page). Useful when you want to embed one specific resource, for example an intro call on a landing page.
 Within each level, there are different widget types:
| Type | When to use |
| ------------------------- | ----------------------------------------------------------------- |
| **Page widget** | Booking is the main content of the page |
| **Panel widget** | You have your own content and only want to embed the booking flow |
| **Button widget** | Booking should open in a modal on click |
| **Global helper widgets** | Login and cart in the site header |
### **Which widgets are available?**
#### **Page widgets**
| Widget | Best for |
| ------------------------- | ----------------------------------------------------------- |
| `a-organization-page` | Full booking page with tabs, filters, optional map/calendar |
| `a-organization-map` | Map-focused organization experience |
| `a-organization-calendar` | Calendar-focused organization experience |
| `a-resource-page` | Full resource detail and booking page |
| `a-resource-map` | Resource map or seating/floor plan view |
| `a-resource-calendar` | Resource calendar view |
| `a-service-page` | Full service detail and booking page |
| `a-subscription-page` | Subscription detail and checkout |
| `a-package-page` | Package detail and checkout |
| `a-my-bookings` | Booking overview of the logged-in user |
#### **Panel widgets**
| Widget | Best for |
| -------------------------- | ------------------------------------------ |
| `a-resource-booking-panel` | Embed only the booking flow for a resource |
| `a-service-booking-panel` | Embed only the booking flow for a service |
#### **Button widgets**
| Widget | Best for |
| ----------------------- | ------------------------------------- |
| `a-organization-button` | Open organization explore in a modal |
| `a-resource-button` | Open resource booking in a modal |
| `a-service-button` | Open service booking in a modal |
| `a-subscription-button` | Open subscription checkout in a modal |
| `a-package-button` | Open package checkout in a modal |
#### Global helper widgets
| Widget | Best for |
| --------------------- | ----------------------------------- |
| `a-cart-modal-button` | Cart trigger with live badge |
| `a-login-button` | Login/logout with shared auth state |
## Step 2: Load the script globally
Add the widget bundle **once** to the `` of your website.
```html theme={null}
```
If you only use the widget on a single page, you can also add the script directly above the component on that page.
## Step 3: Check settings and insert the snippet
Open the booking page of the relevant level in the admin area, choose the component you want, and configure the options.
**At organization level** (page widget), the following settings are available, among others:
* Hide header on organization/resource page
* Hide filters and map toggle
* Default tab and default view (e.g. grid)
* Category for pre-filtering
* Widget height and navbar height
**At resource level** (page widget), the following settings are available, among others:
* Hide header on resource/organization page
* Preselected service
* Widget height and navbar height
Then copy the generated embed code and add the component at the position where it should appear on your website.
Example of a full-page widget at organization level:
```html theme={null}
```
Example of an embedded booking panel:
```html theme={null}
```
Example of a button widget:
```html theme={null}
```
## Step 4: Adapt the design
Go to Organization → Settings → Booking page and open the design panel via "Customize design". There you can set:
* Primary color and secondary color
* Text and background color
* Input background and border color
* Corner radius (rounded or square)
* Logo for the loading animation
anny saves the design for the entire account, so you don't have to set it again per resource. In the live preview, you see your changes right away.
## Step 5: Test
Open the page in your browser and check:
* The widget loads and shows content
* The booking flow can be completed in full
* The design matches the rest of the page
* The layout is correct on mobile viewports
* The login and cart button (if used) are visible and work
## Checklist
* Script added globally in the header
* Widget configured at account or resource level
* Component placed at the right position on the website
* Design adapted and saved
* Widget tested and booking flow checked
Within each level, there are different widget types:
| Type | When to use |
| ------------------------- | ----------------------------------------------------------------- |
| **Page widget** | Booking is the main content of the page |
| **Panel widget** | You have your own content and only want to embed the booking flow |
| **Button widget** | Booking should open in a modal on click |
| **Global helper widgets** | Login and cart in the site header |
### **Which widgets are available?**
#### **Page widgets**
| Widget | Best for |
| ------------------------- | ----------------------------------------------------------- |
| `a-organization-page` | Full booking page with tabs, filters, optional map/calendar |
| `a-organization-map` | Map-focused organization experience |
| `a-organization-calendar` | Calendar-focused organization experience |
| `a-resource-page` | Full resource detail and booking page |
| `a-resource-map` | Resource map or seating/floor plan view |
| `a-resource-calendar` | Resource calendar view |
| `a-service-page` | Full service detail and booking page |
| `a-subscription-page` | Subscription detail and checkout |
| `a-package-page` | Package detail and checkout |
| `a-my-bookings` | Booking overview of the logged-in user |
#### **Panel widgets**
| Widget | Best for |
| -------------------------- | ------------------------------------------ |
| `a-resource-booking-panel` | Embed only the booking flow for a resource |
| `a-service-booking-panel` | Embed only the booking flow for a service |
#### **Button widgets**
| Widget | Best for |
| ----------------------- | ------------------------------------- |
| `a-organization-button` | Open organization explore in a modal |
| `a-resource-button` | Open resource booking in a modal |
| `a-service-button` | Open service booking in a modal |
| `a-subscription-button` | Open subscription checkout in a modal |
| `a-package-button` | Open package checkout in a modal |
#### Global helper widgets
| Widget | Best for |
| --------------------- | ----------------------------------- |
| `a-cart-modal-button` | Cart trigger with live badge |
| `a-login-button` | Login/logout with shared auth state |
## Step 2: Load the script globally
Add the widget bundle **once** to the `` of your website.
```html theme={null}
```
If you only use the widget on a single page, you can also add the script directly above the component on that page.
## Step 3: Check settings and insert the snippet
Open the booking page of the relevant level in the admin area, choose the component you want, and configure the options.
**At organization level** (page widget), the following settings are available, among others:
* Hide header on organization/resource page
* Hide filters and map toggle
* Default tab and default view (e.g. grid)
* Category for pre-filtering
* Widget height and navbar height
**At resource level** (page widget), the following settings are available, among others:
* Hide header on resource/organization page
* Preselected service
* Widget height and navbar height
Then copy the generated embed code and add the component at the position where it should appear on your website.
Example of a full-page widget at organization level:
```html theme={null}
```
Example of an embedded booking panel:
```html theme={null}
```
Example of a button widget:
```html theme={null}
```
## Step 4: Adapt the design
Go to Organization → Settings → Booking page and open the design panel via "Customize design". There you can set:
* Primary color and secondary color
* Text and background color
* Input background and border color
* Corner radius (rounded or square)
* Logo for the loading animation
anny saves the design for the entire account, so you don't have to set it again per resource. In the live preview, you see your changes right away.
## Step 5: Test
Open the page in your browser and check:
* The widget loads and shows content
* The booking flow can be completed in full
* The design matches the rest of the page
* The layout is correct on mobile viewports
* The login and cart button (if used) are visible and work
## Checklist
* Script added globally in the header
* Widget configured at account or resource level
* Component placed at the right position on the website
* Design adapted and saved
* Widget tested and booking flow checked