> ## Documentation Index
> Fetch the complete documentation index at: https://docs.anny.co/llms.txt
> Use this file to discover all available pages before exploring further.
# Introduction to the Admin Area
> Get to know the anny admin area: set up your profile, invite team members, and see the key areas at a glance.
The admin area is your central tool for managing your anny account. Here you create and manage resources, bookings, customers, and all organization-wide settings. Its counterpart is the booking page, where your customers, employees, or students book.
Only people with admin rights have access to the admin area. If you were just invited, this article helps you get started.
## Accept the invitation
You were invited to the admin area by email (sender: [bookings@anny.co](mailto:bookings@anny.co)). Here is how to accept the invitation:
Look for the invitation email in your inbox. Also check the spam folder.
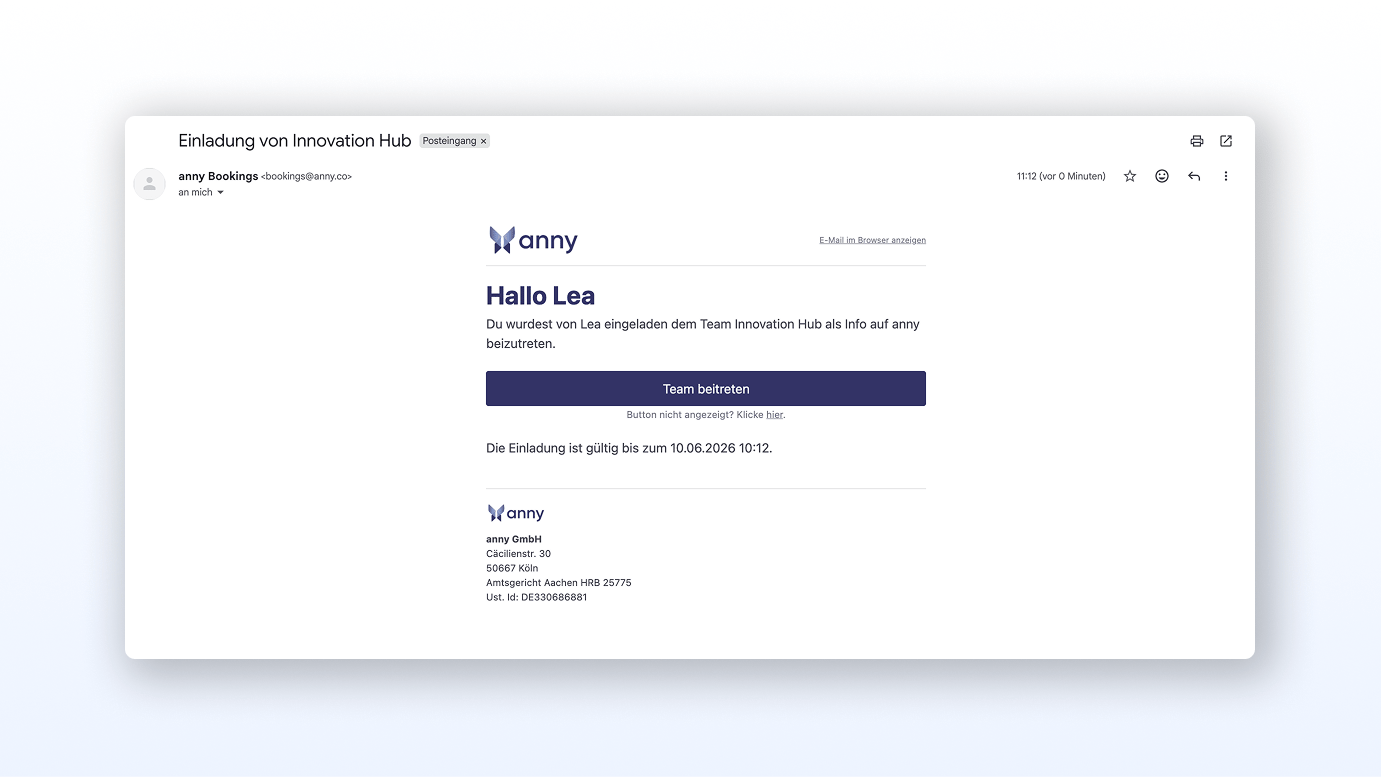 Click **Join team**. Sign in with your existing anny account or create a new one.
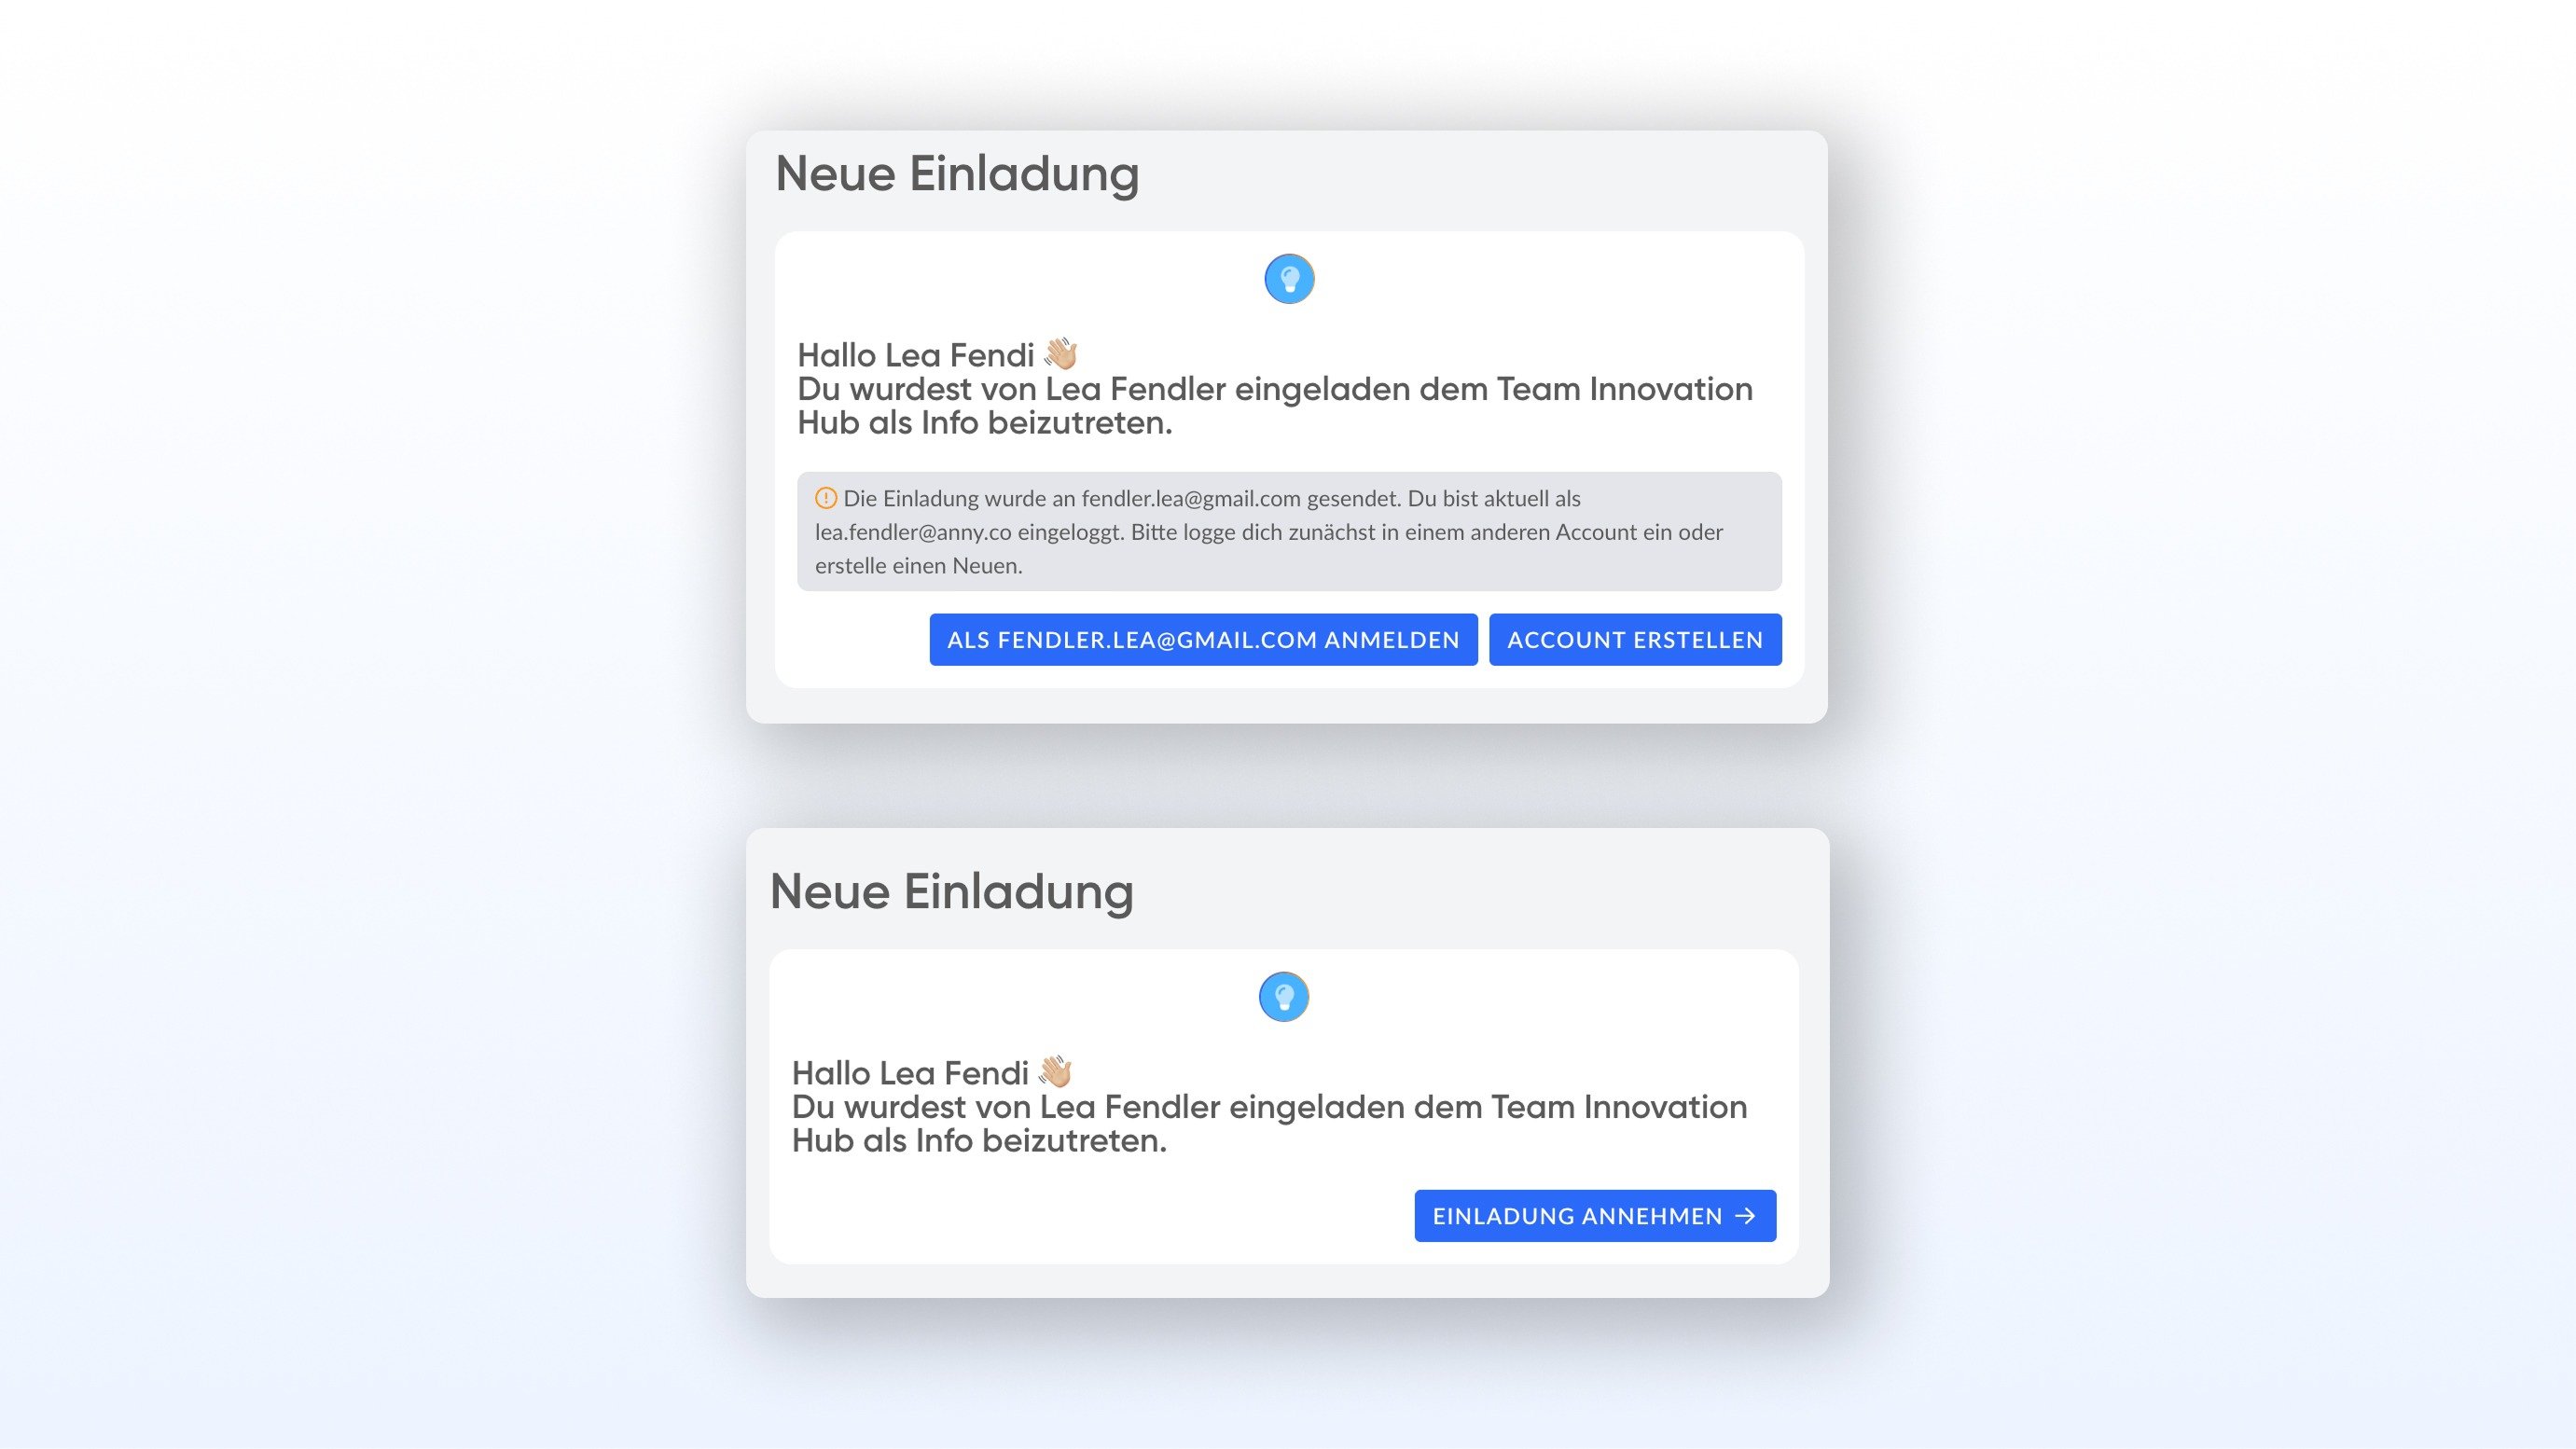 Click **Accept invitation**. You are redirected directly to the admin area.
## Set up your profile and notifications
As an admin, you receive notifications about bookings, cancellations, and payments. Adjust your profile and notifications right after your first login:
Click your **avatar** in the top right and select **Profile & Notifications**.
Set the system language, time zone, and email address.
Under the categories (bookings, subscriptions, payments, integrations), choose which notifications you want to receive. Under **Relevant resources**, you can limit the notifications to specific resources. You can also set a booking period for notifications.
## Invite new team members to the admin area
Want to add more colleagues as admins? Here is how:
Click your **avatar** in the top right and select [**Manage admin users**](/en/roles-and-permissions).
Click **+ Invite**, enter the name and email address, and assign a role.
Click **Manage permissions** to set the rights granularly before sending, e.g. only for specific resources.
## Overview: What you find where
The admin area is organized into seven main areas via the left menu bar:
| Menu item | Areas |
| ------------- | -------------------------------------------------------------------------------------- |
| **Overview** | Home, Dashboard, Exports (Exports, Export schedules) |
| **Bookings** | Calendar, Bookings (Bookings, Blockers) |
| **Customers** | Customers, Companies, Communities |
| **Offers** | Resources (Resources, Cards), Services, Subscription plans, Booking packages, Products |
| **Billing** | Orders, Subscriptions, Invoices, Codes (Booking codes, Discount codes) |
| **Check-In** | Check-In |
| **Apps** | Integrations, Displays |
Via the **avatar** in the top right, you also reach:
* **Account settings**: Organization-wide configuration (layout, invoices, features, security). Learn more in the article [Account Settings](/en/account-settings).
* **Manage admin users**: Team members and roles
* **Profile & Notifications**: Your personal admin profile
* **Subscription & Billing**: Manage your anny plan
An overview of all bookings and availabilities of your resources, clearly laid out in a timeline view, so you can view and manage appointments directly.
Click **Accept invitation**. You are redirected directly to the admin area.
## Set up your profile and notifications
As an admin, you receive notifications about bookings, cancellations, and payments. Adjust your profile and notifications right after your first login:
Click your **avatar** in the top right and select **Profile & Notifications**.
Set the system language, time zone, and email address.
Under the categories (bookings, subscriptions, payments, integrations), choose which notifications you want to receive. Under **Relevant resources**, you can limit the notifications to specific resources. You can also set a booking period for notifications.
## Invite new team members to the admin area
Want to add more colleagues as admins? Here is how:
Click your **avatar** in the top right and select [**Manage admin users**](/en/roles-and-permissions).
Click **+ Invite**, enter the name and email address, and assign a role.
Click **Manage permissions** to set the rights granularly before sending, e.g. only for specific resources.
## Overview: What you find where
The admin area is organized into seven main areas via the left menu bar:
| Menu item | Areas |
| ------------- | -------------------------------------------------------------------------------------- |
| **Overview** | Home, Dashboard, Exports (Exports, Export schedules) |
| **Bookings** | Calendar, Bookings (Bookings, Blockers) |
| **Customers** | Customers, Companies, Communities |
| **Offers** | Resources (Resources, Cards), Services, Subscription plans, Booking packages, Products |
| **Billing** | Orders, Subscriptions, Invoices, Codes (Booking codes, Discount codes) |
| **Check-In** | Check-In |
| **Apps** | Integrations, Displays |
Via the **avatar** in the top right, you also reach:
* **Account settings**: Organization-wide configuration (layout, invoices, features, security). Learn more in the article [Account Settings](/en/account-settings).
* **Manage admin users**: Team members and roles
* **Profile & Notifications**: Your personal admin profile
* **Subscription & Billing**: Manage your anny plan
An overview of all bookings and availabilities of your resources, clearly laid out in a timeline view, so you can view and manage appointments directly.
[Learn more](/en/calendar)
Create, edit, and cancel bookings centrally, and keep track of their status and details such as forms, legal documents, and access.
[Learn more](/en/modify-bookings)
Manage all customer data and their booking history bundled in one place. See associated plans, quotas, invoices, and companies.
[Learn more](/en/manage-customers)
Check your spam folder. The email comes from [bookings@anny.co](mailto:bookings@anny.co). If it doesn't appear, ask the inviting admin to send the invitation again.
With the **Super Admin** or **Admin** role, you have access to all areas. For restricted access, there are custom roles. Learn more in the article [Rights & Role Management](/en/roles-and-permissions).
Yes. Under **Profile & Notifications**, in the booking notifications under **Relevant resources**, you can select exactly which resources you want to be notified about.
In the admin area, you manage everything: resources, bookings, customers, settings. The booking page is what your customers see and where they book.
> Important information for agents:
>
> The admin area is not identical to the account settings. Account settings are a subsection, reachable via Avatar → Account settings.
>
> UI paths:
>
> * Profile & Notifications: **Avatar** (top right) → **Profile & Notifications**
> * Manage admin users: **Avatar** (top right) → **Manage admin users**
> * Subscription & Billing: **Avatar** (top right) → **Subscription & Billing**
>
> Menu bar (left): Overview (Home, Dashboard, Exports), Bookings (Calendar, Bookings/Blockers), Customers (Customers, Companies, Communities), Offers (Resources/Cards, Services, Subscription plans, Booking packages, Products), Billing (Orders, Subscriptions, Invoices, Codes), Check-In, Apps (Integrations, Displays).
>
> Roles: Super Admin has all rights. Admin has all rights by default but can be restricted. Custom roles can be configured granularly per area and resource.
>
> Related articles: Account Settings (/en/account-settings), Rights & Role Management (/en/roles-and-permissions), Admin notifications (/en/notifications).